How to define file groups as exclusions to Antivirus, Firewall, HIPS and Containment
Views
9658 times
Category
profiles
Tags
- Endpoint Manager lets you specify groups of applications that you trust. You can then exclude these groups from inspection by various security components.
- You can exclude groups from the antivirus, firewall, HIPS and containment modules
Use the links below to jump to the task you need help with:
- Create a file group of applications
- Antivirus – create an exclusion for the group
- Firewall - create a rule to allow access for the group
- HIPS – create a rule to allow access for the group
- Containment – create a rule to ignore applications in the group
Create a file group of applications
- File groups are collections of one or more files. You can select a file group as the target of antivirus scan exclusions, firewall rules, HIPS rules, and containment rules.
- Endpoint Manager ships with predefined groups of popular file types. For example, there are groups for ‘Windows updater applications’, ‘Web browsers’, ‘Email clients’ and ‘Metro Apps’.
- If none of the predefined groups cover your needs, you can create a custom file group that contains specific applications.
Create a file group
- Login to Comodo One / Dragon
- Click 'Applications' > 'Endpoint Manager'
- Click 'Settings' > 'System Templates'
- Select the 'File Groups Variables' tab
- Create a name for the filegroup then click the
button
- The group name should ideally identify the members of the group. For example, 'Custom Allowed Applications' or 'Custom Blocked Applications.'


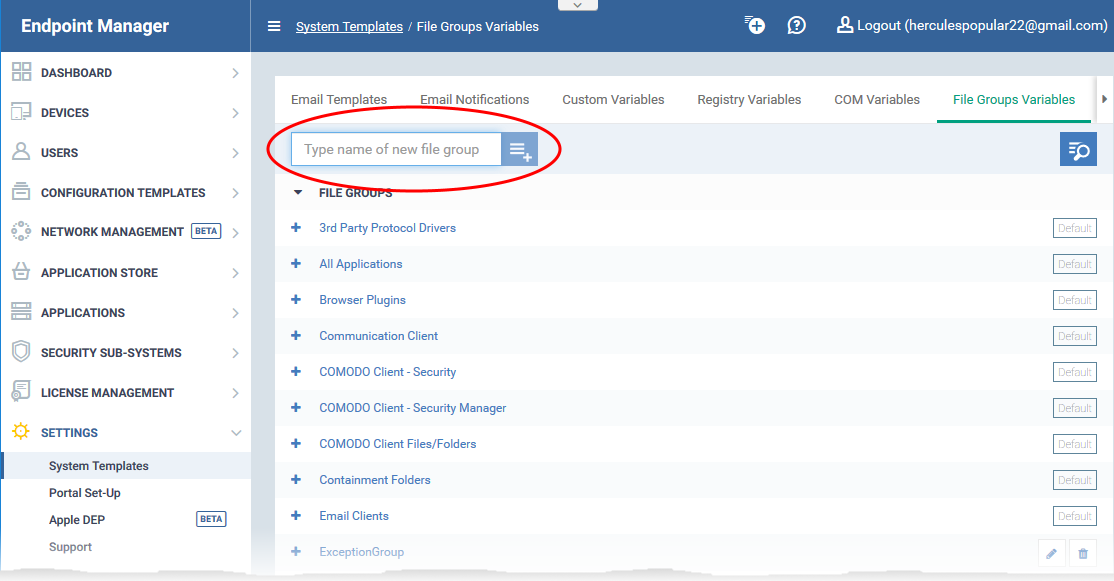
The file group will be added to the list. The next step is to add files to the group.
- Click the '+' button at the left of the group name

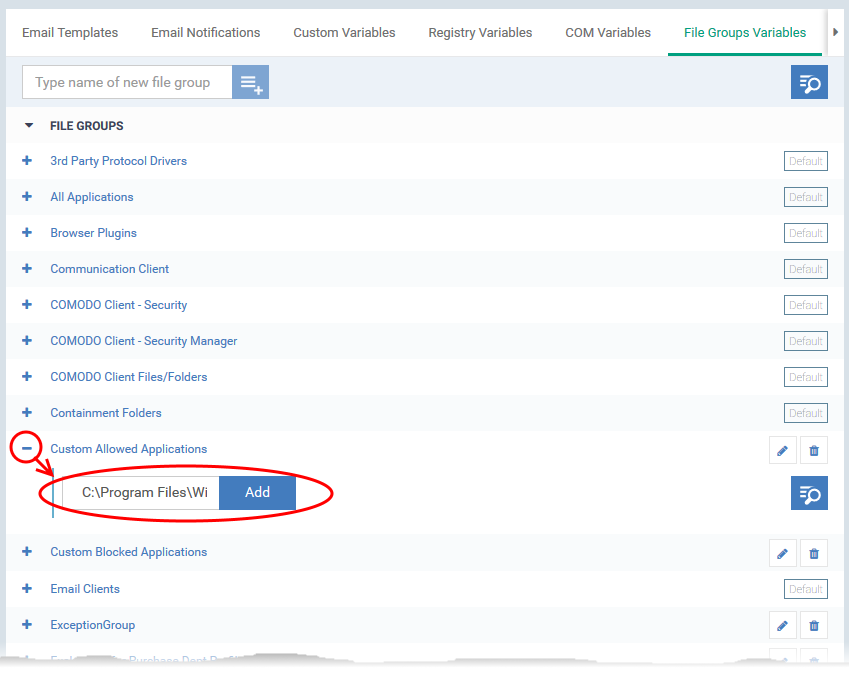
- Enter the full path of the file/folder containing your target files. Click ‘Add’
- To include all files in a folder, place a wildcard ‘*’ character after the folder name.
For example - C:\My Files\*
- To include all files in a folder, place a wildcard ‘*’ character after the folder name.
- Repeat the process to add more files to the group.
Antivirus – create an exclusion for the group
- You specify excluded groups in the 'Exclusions' tab of a profile’s antivirus section.
- All member applications are skipped in real-time scans and custom scan profiles.
- See Create a file group if you need help to create a file group.
Exclude a group
- Login to Comodo One / Dragon
- Click 'Applications' > 'Endpoint Manager'
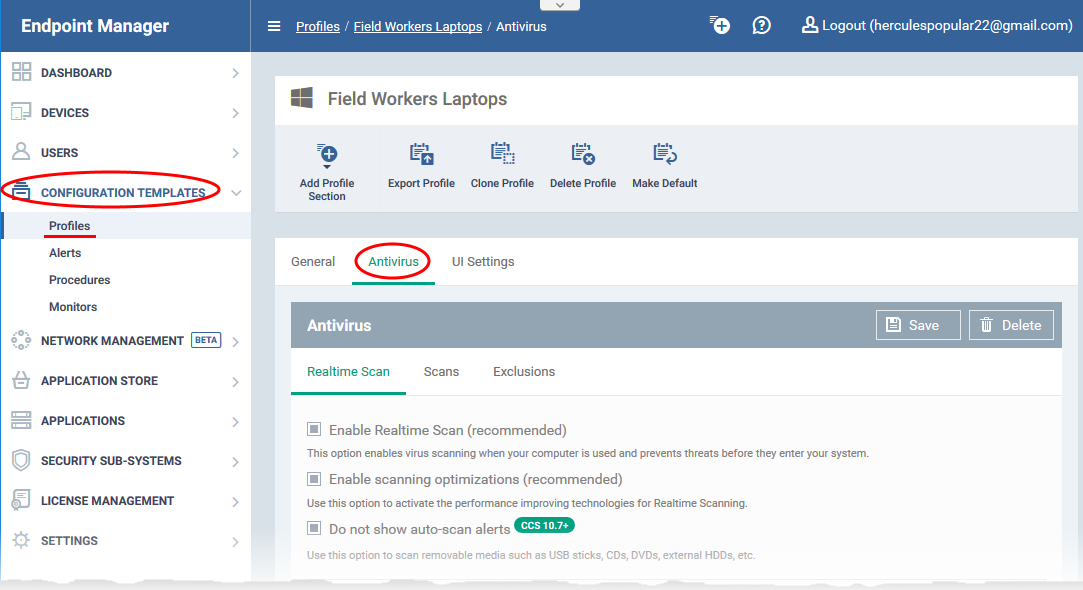
- Click 'Configuration Templates' > 'Profiles' > 'Profiles'
- Open the Windows profile applied to your target devices
- Open the 'Antivirus' tab
OR
- Click 'Add Profile Section' > 'Antivirus', if it hasn't yet been added
- Open the 'Antivirus' tab

- Click the 'Exclusions' tab then select 'Excluded Groups'
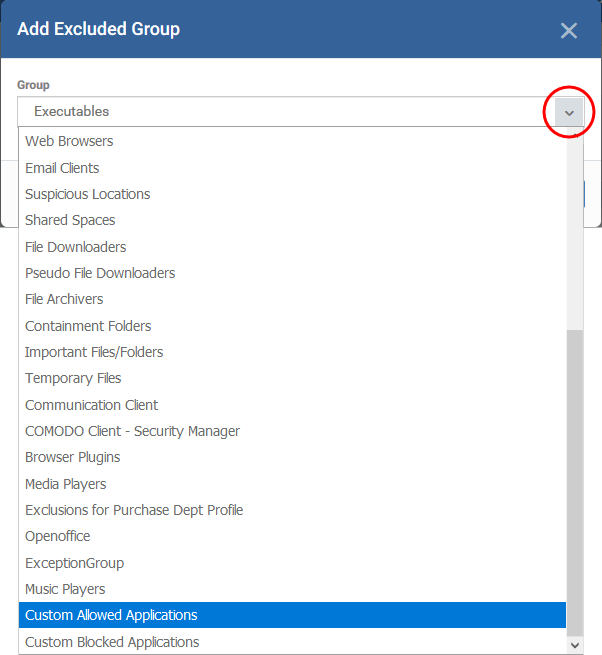
- Click 'Add'

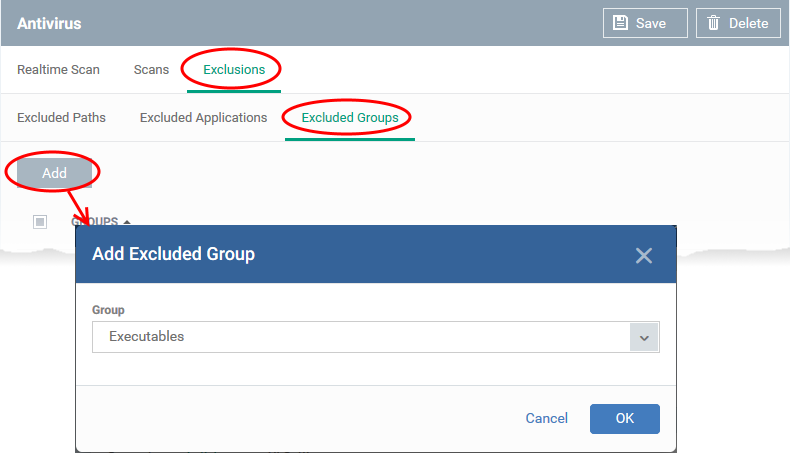
- Choose the file group you want to add and click 'OK'

- Click 'Save' in the 'Antivirus' settings screen.
Firewall – create a rule to allow access for the group
- You create allow rules in the 'Application Rules' tab of a profile’s firewall section.
- See Create a file group if you need help to create a file group.
Add a firewall ‘Allow’ rule
- Click ‘Configuration Templates’ > ‘Profiles’
- Open the Windows profile applied to your target devices
- Open the 'Firewall' tab
OR
- Click 'Add Profile Section' > 'Firewall', if it hasn't yet been added
- Open the 'Firewall' tab
- Click the 'Application Rules' tab.
- Click ‘Add’ to start the rule creation process:

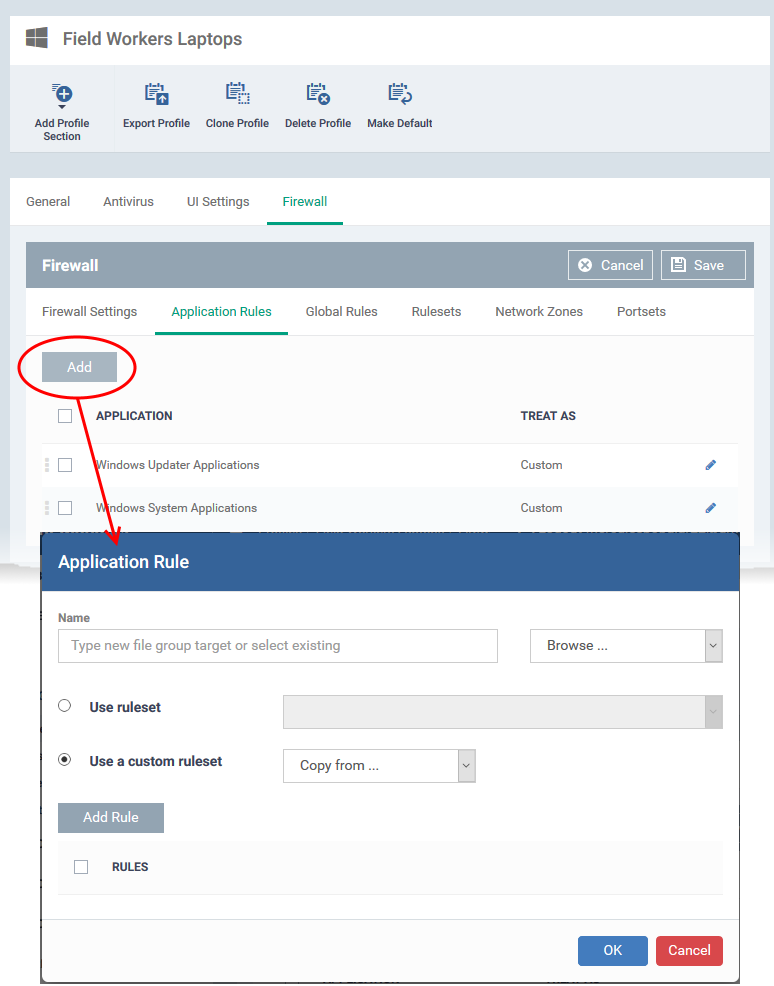
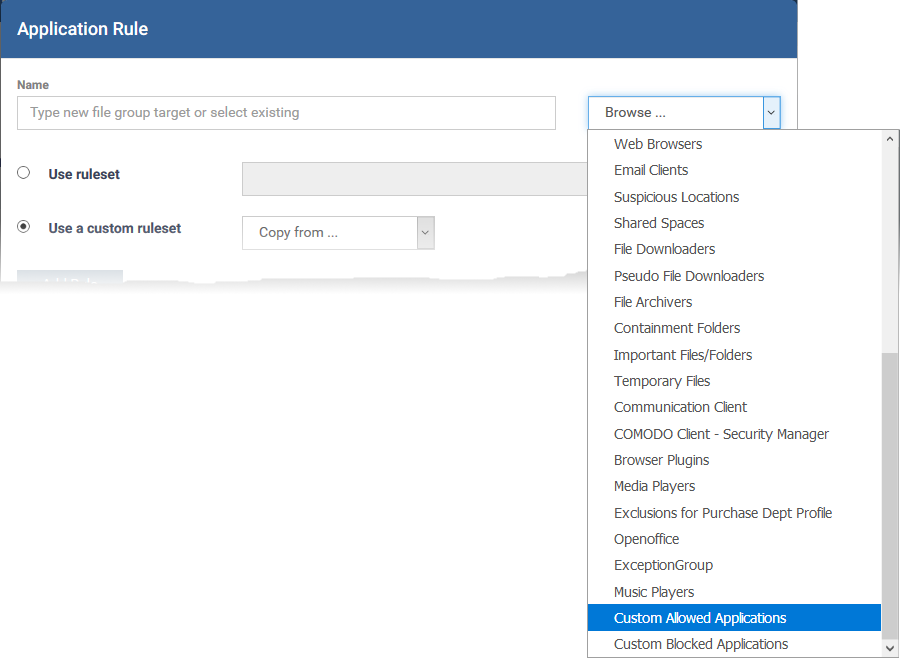
- Click ‘Browse...’ in the menu at top-right
- Choose the application group you created earlier:

- The 'Name' field is auto-populated with the group you chose:
The next step is to choose the rule for applications in the group. There are two options:
- Use a pre-defined ruleset - These contain ‘already-configured’ rules that achieve specific aims, or are suited to specific application types. For example, there are rulesets for ‘Allowed applications’, ‘Blocked applications’, ‘Web browsers’ and ‘Email clients’.
- Use a custom ruleset - Create your own ruleset. You can copy rules from a predefined ruleset and edit them if required. See How to create a custom firewall rule set in a Windows profile if you need help with this.
- Use a pre-defined ruleset - These contain ‘already-configured’ rules that achieve specific aims, or are suited to specific application types. For example, there are rulesets for ‘Allowed applications’, ‘Blocked applications’, ‘Web browsers’ and ‘Email clients’.
- Select 'Use ruleset':

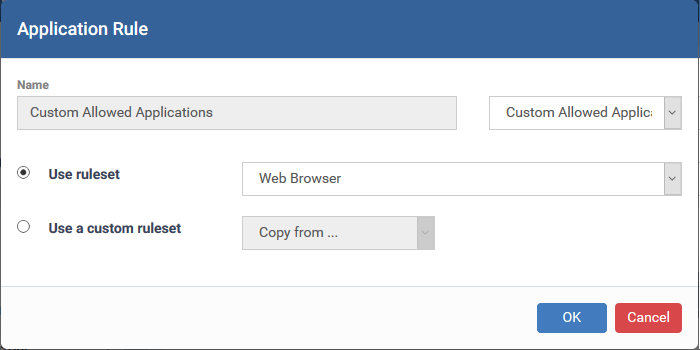

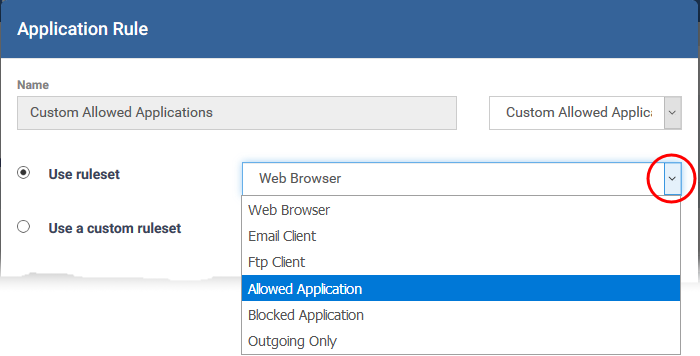
- Choose 'Allowed Application' from the menu.
- Click 'OK'
- Click 'Save' in the firewall settings pane.
HIPS – create a rule to allow access for the group
- You create allow rules in the 'HIPS Rules' tab of a profile’s HIPS section.
- You first need to create a ruleset with the appropriate access rights and protection settings, then create the ‘Allow’ rule itself.
Step 1 – Create a HIPS ruleset
A HIPS ruleset is a set of access and protection settings that can be deployed to apps or app groups.
- Click ‘Configuration Templates’ > ‘Profiles’
- Open the Windows profile applied to your target devices
- Open the 'HIPS' tab
OR
- Click 'Add Profile Section' > 'HIPS', if it hasn't yet been added
- Open the 'HIPS' tab
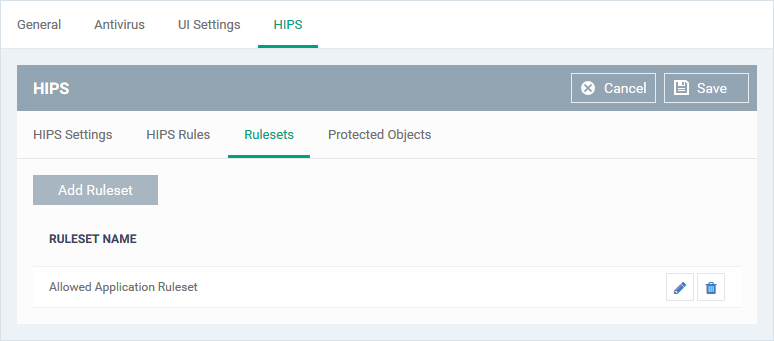
- Click the 'Rulesets' tab.

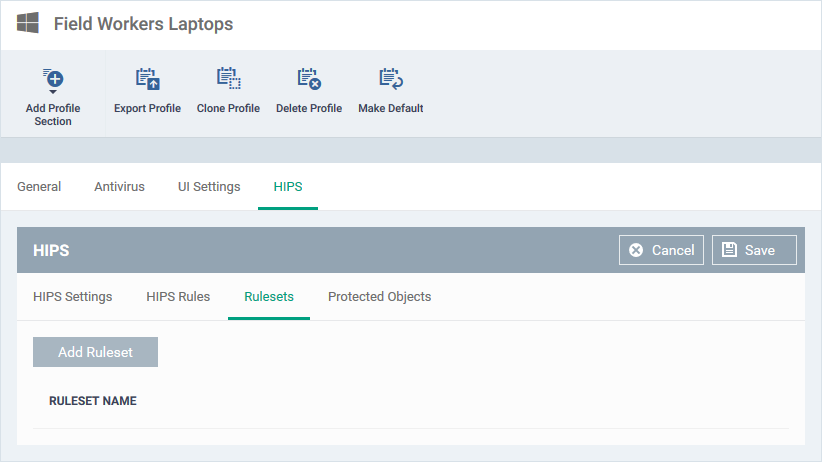
- Click the 'Add Ruleset' button:

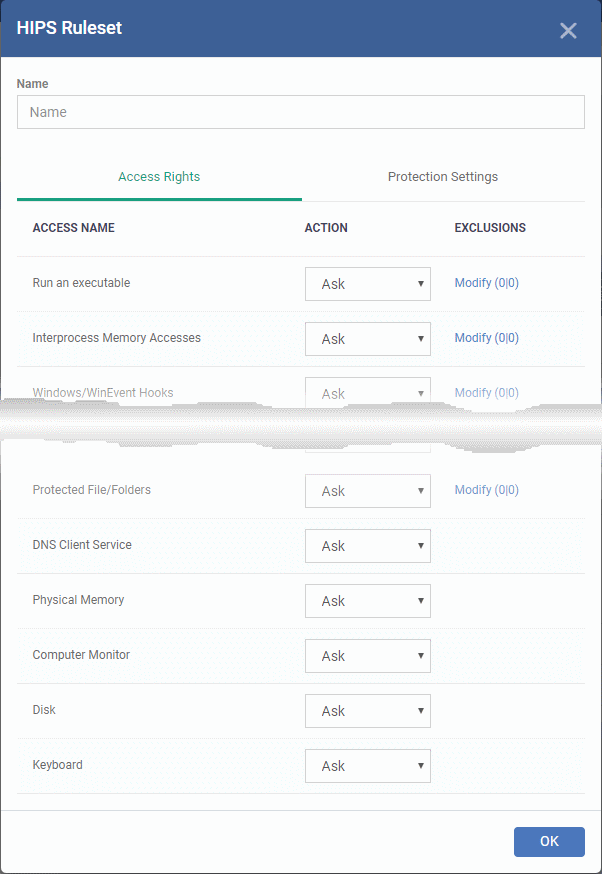
- Enter a name for the ruleset.
The lower half of the window has two tabs:
- Access Rights – Activities that can be performed by applications under this ruleset.
- Select 'Allow' for any activity you want to permit for group applications
- Select 'Allow' for any activity you want to permit for group applications
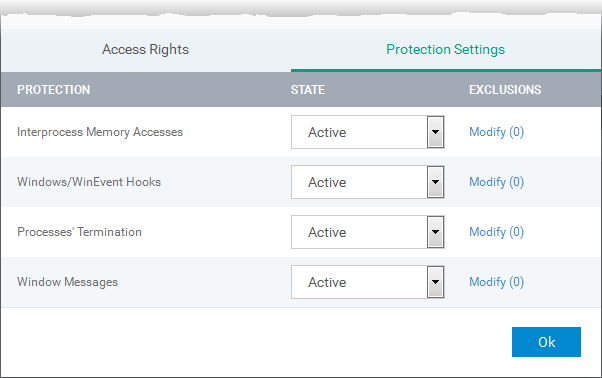
- Protection Settings – The level of protection the group has against other processes.
- Active - Enable protection against the process type in the 'Protection State' column.
- Inactive – Disable protection against the process type in the ‘Protection State’ column
- Active - Enable protection against the process type in the 'Protection State' column.
- Select ‘Inactive’ for all process type you want to allow
- Click 'OK' to save your ruleset


Step 2 – Create the HIPS rule for the group
- Click the 'HIPS Rules' tab
- Click 'Add Rule'

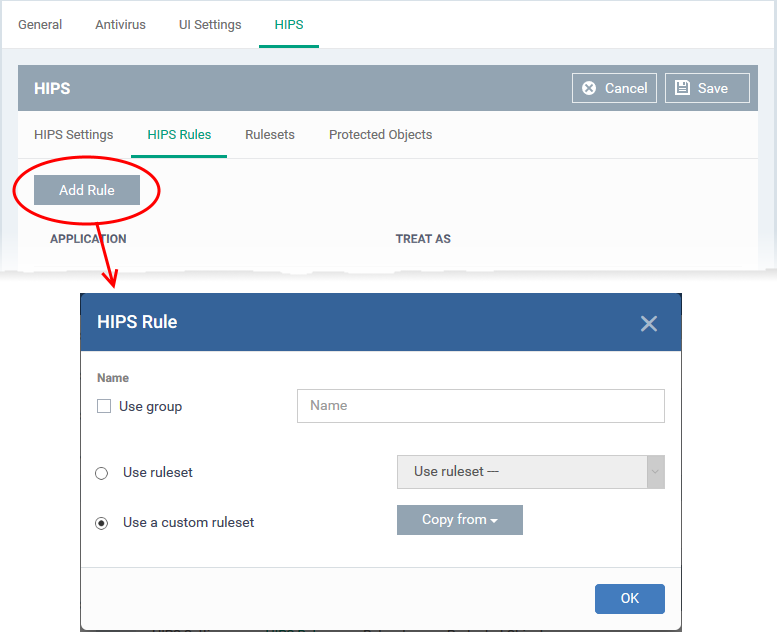
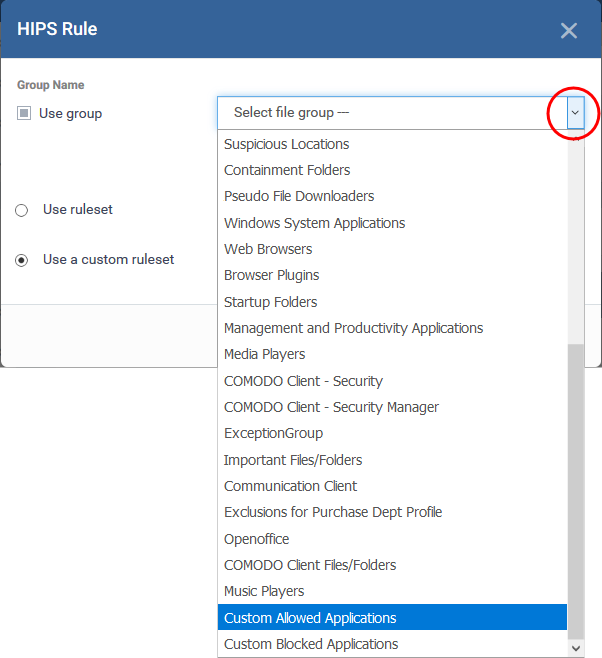
- Select 'Use group' and choose the file group to which you want to apply the rule:

- Next, choose the HIPS ruleset for the group. This are two options:
- Use ruleset- Select an existing ruleset. Rulesets are added to a profile under the 'Rulesets' tab as explained above.
- Use a custom ruleset – Copy the rules from a saved ruleset then edit them as required
- Use ruleset- Select an existing ruleset. Rulesets are added to a profile under the 'Rulesets' tab as explained above.
- Select 'Use ruleset'
- Choose your new ‘allowed’ ruleset from the drop-down:


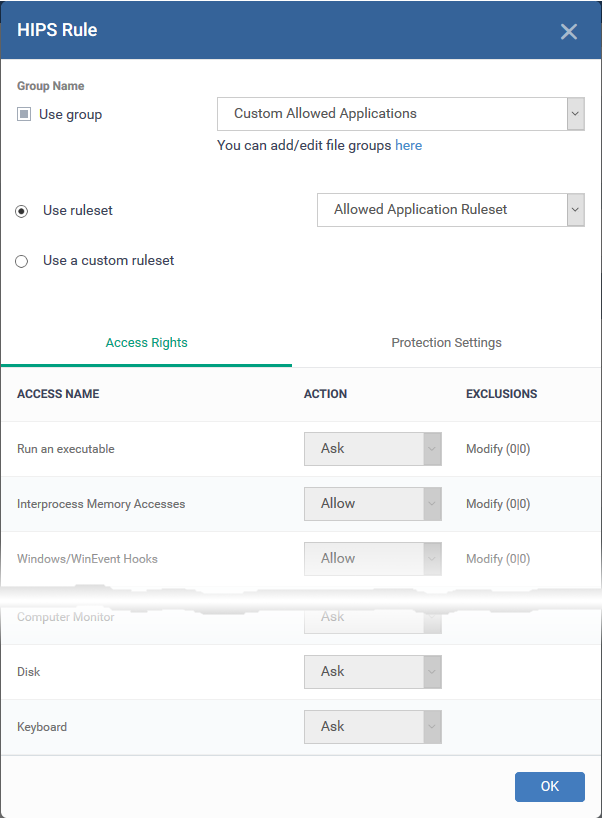

- Click 'OK' to save the HIPS rule

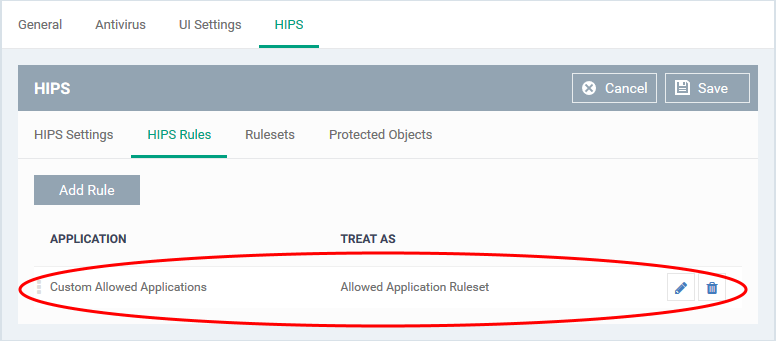
- Click Save in the 'HIPS' settings interface
Containment – create a rule to ignore applications in the group
- You can create an auto-containment rule to ignore certain applications or file groups
- All apps in the group will be allowed to run outside the container, regardless of their trust rating.
- See Create a file group if you need help to create a group.
Create the rule
- Click ‘Configuration Templates’ > ‘Profiles’
- Open the Windows profile applied to your target devices
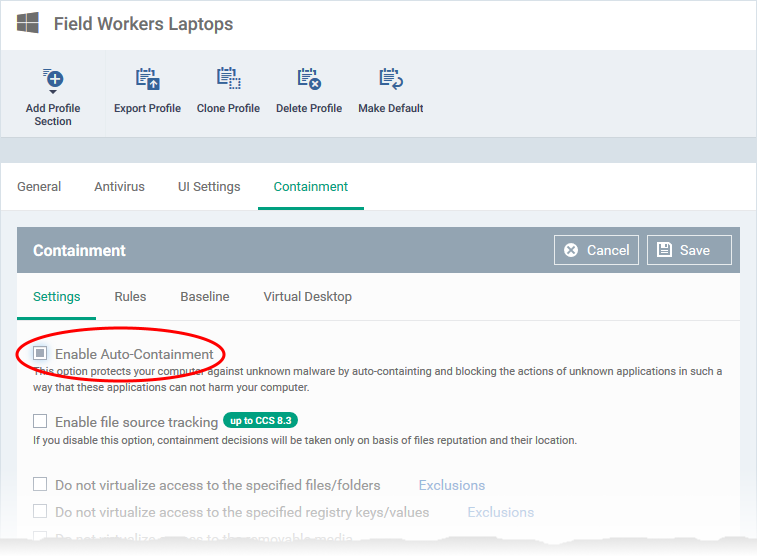
- Open the 'Containment' tab
OR
- Click 'Add Profile Section' > 'Containment', if it hasn't yet been added
- Open the 'Containment' tab
- Click the 'Settings' tab.
- Ensure that 'Enable Auto-containment' is selected

- Click the 'Rules' tab
- Click 'Add Rule'

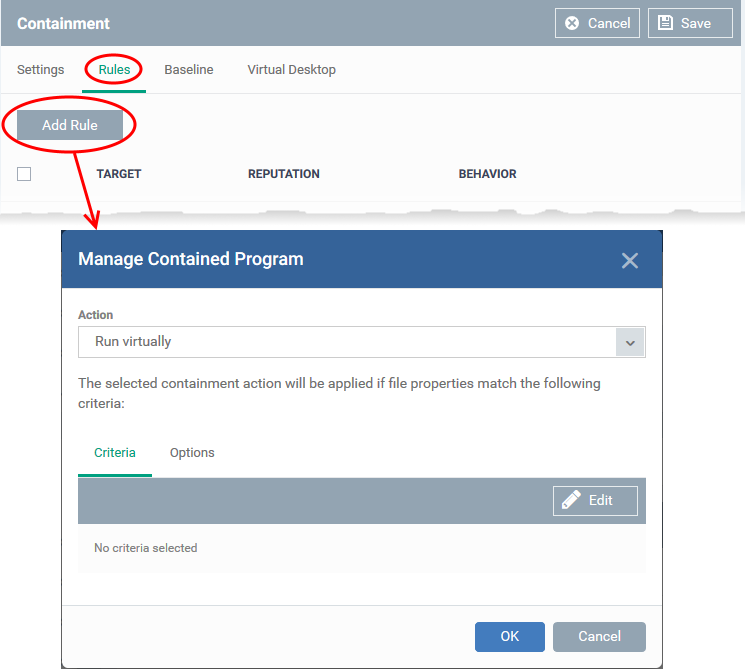
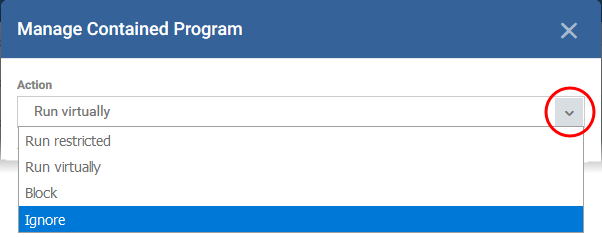
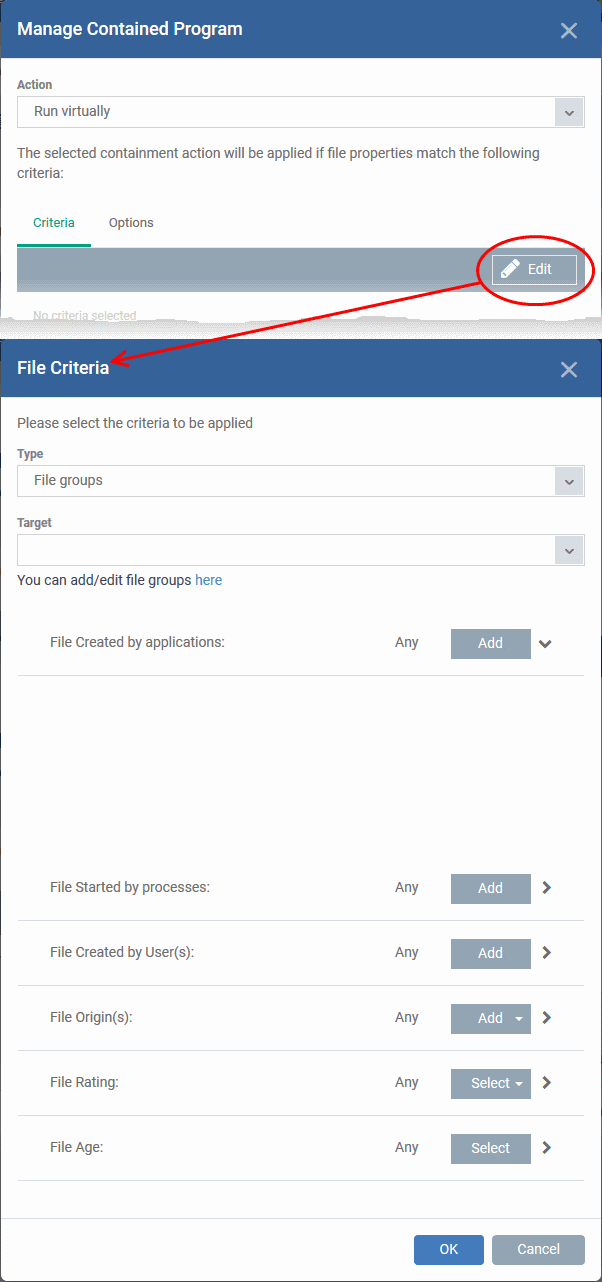
- Choose the rule action at the top, then the conditions under which it should be implemented at the bottom:
- Action - Select 'Ignore' to run applications in the group outside the container:
- Action - Select 'Ignore' to run applications in the group outside the container:

- Criteria - The conditions under which the rule becomes active. This is where you specify your group.
- Click ‘Edit’:
- Type - Select 'File Groups' from the drop-down
- Target - Choose your target file group:
- Leave all filter conditions at 'Any' to completely exclude the group from containment
- Click here if you want an explanation of each filter
- Click ‘Edit’:
- Options
- Log when this action is performed – Create a containment log in CCS on the endpoint when the rule is triggered.
- Don't apply the selected action to child processes - Child processes are those started by the target application.
- This option is disabled by default, so the ignore rule also applies to child processes.
- If enabled, the ignore rule does not apply to child processes. Each child process will be inspected individually and all relevant rules applied.
- This option is disabled by default, so the ignore rule also applies to child processes.
- Log when this action is performed – Create a containment log in CCS on the endpoint when the rule is triggered.
- Click 'OK' to save the rule
- Move the new rule to the top of the rules list (you can drag and drop rules)
- Click 'Save' in the 'Containment' settings interface.


CONTACT US
Call now!  (973) 859 4000 ext 3025
---