How to use Unknown File Hunter
Introduction
-
'Comodo Unknown File Hunter (UFH) scans your network endpoints to identify unrecognized, potentially malicious files.'
-
UFH classifies all audited files as 'Safe', 'Malicious' or 'Unknown'.
-
'Safe' files are OK to run, while malicious files should obviously be deleted. UFH allows you to upload 'Unknown' files to Comodo Valkyrie for analysis.
-
Valkyrie runs a series of static and dynamic behavior tests on the file to determine whether or not the file poses a threat. The results of the tests can be viewed in the UFH interface.
Process in brief
-
Download and install UFH
-
'C1 customers – Click 'Tools' > Click 'Download' in the 'Unknown File Hunter' tile
-
Non-customers – Download the file from https://valkyrie.comodo.com/
-
-
Launch the application
-
Select target endpoints by network address, active directory domain, workgroup, or simply scan your local computer
-
Select a scan type:
-
Quick scan – Scans critical and commonly infected areas of target endpoints.
-
Full scan - Scans all files and folders on target endpoints.
-
-
Click 'Scan Now'
-
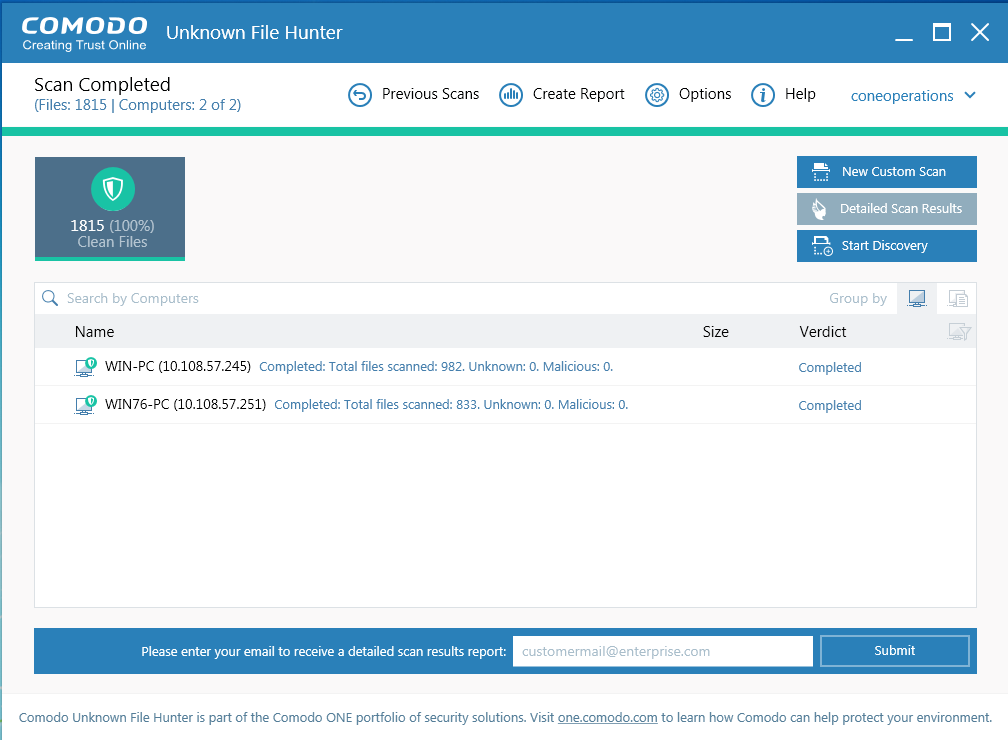
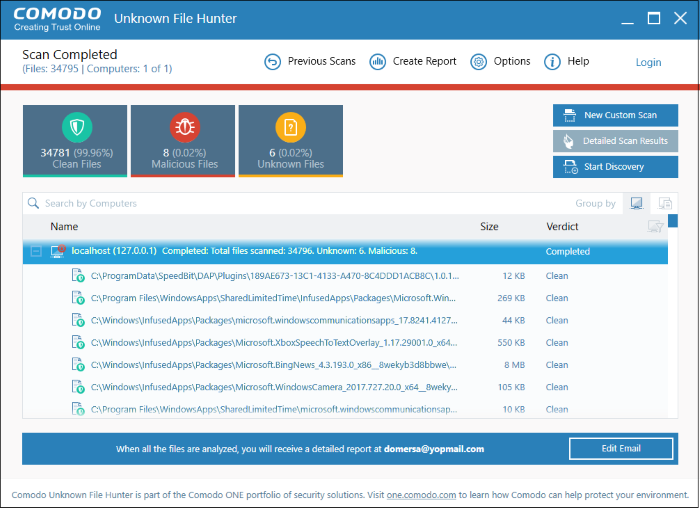
Results of the scan are shown in the UFH interface. File ratings are as follows:
-
Clean – A whitelisted file which is safe to run
-
Malicious – A blacklisted file which is a known threat / malware
-
Unknown – There is no trust verdict available for this file. These files can be uploaded to Valkyrie for analysis to determine whether they are trustworthy or not.
-
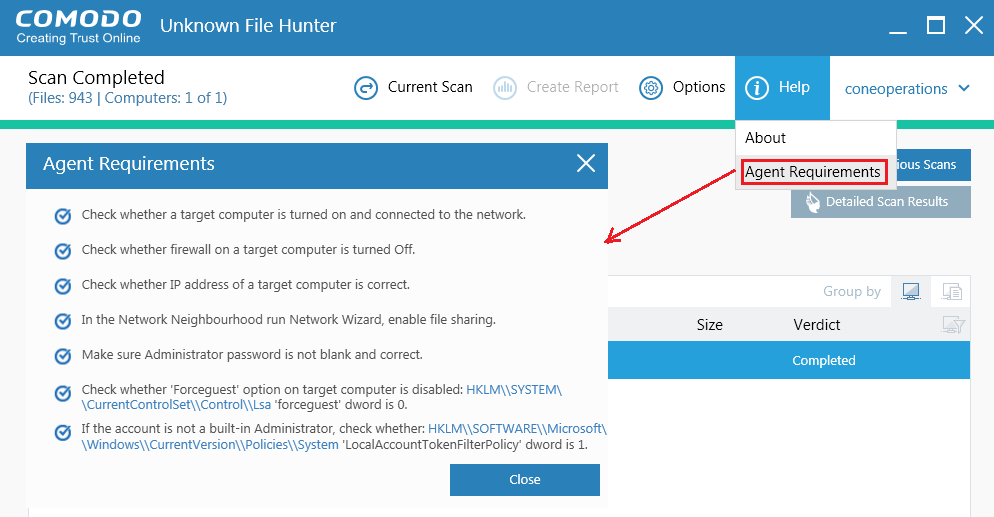
Note: Click 'Help' > 'Agent Requirements' for help to run the agent:
Process in detail
Start the Scan:
-
Download and install UFH as described above then launch the application
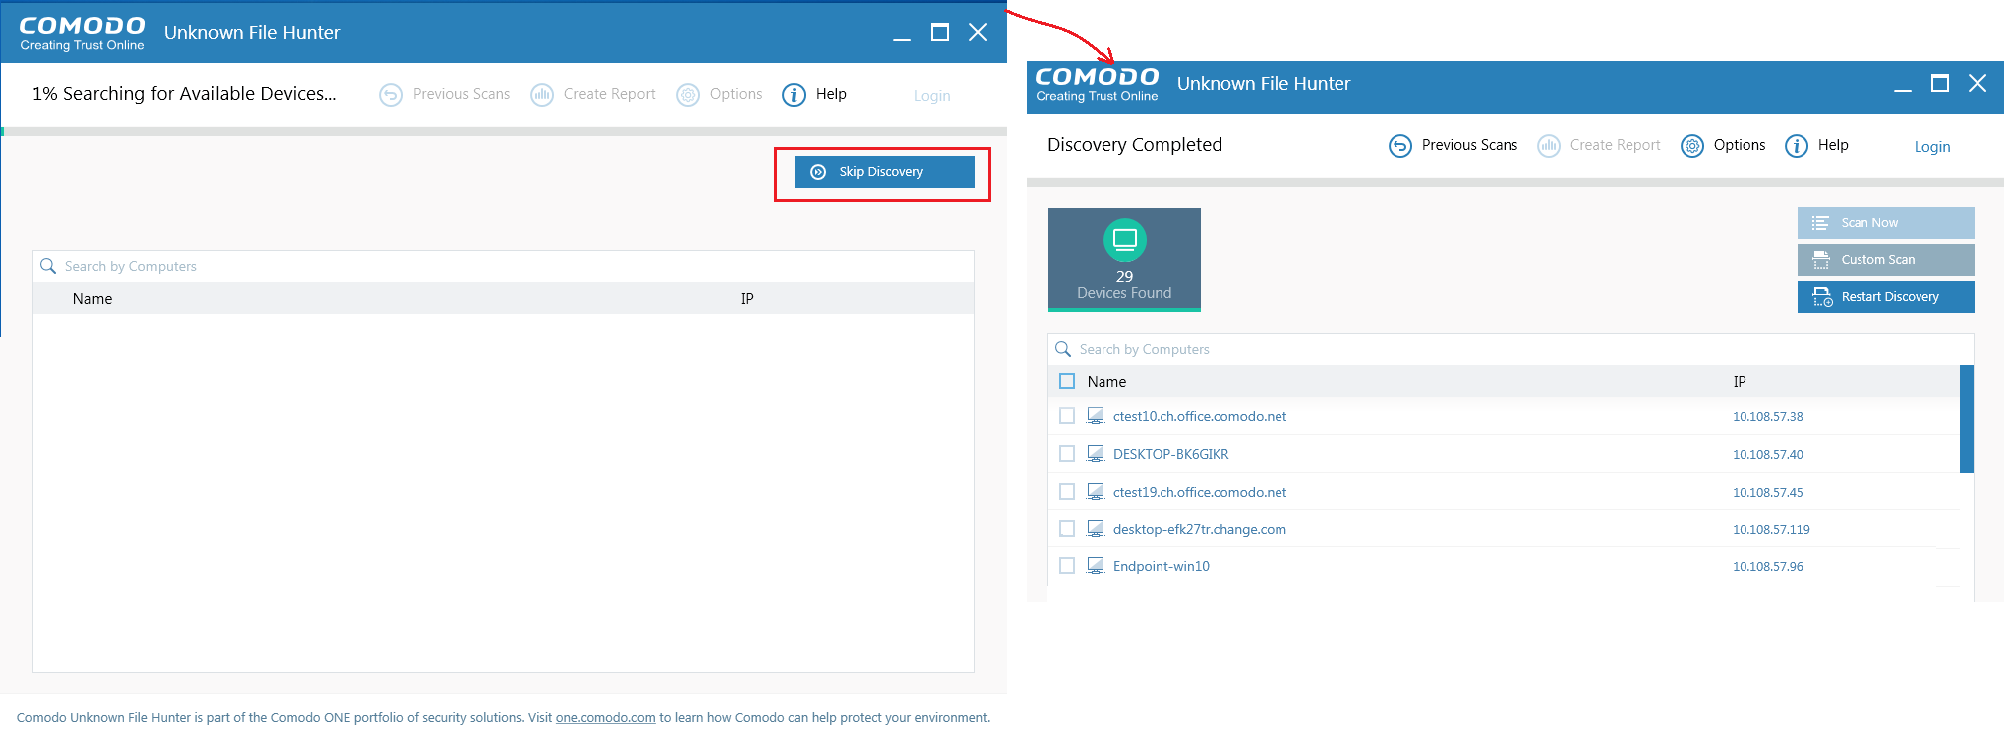
- The scan will be started automatically.
- Click "Skip Discovery" to stop the discovery.
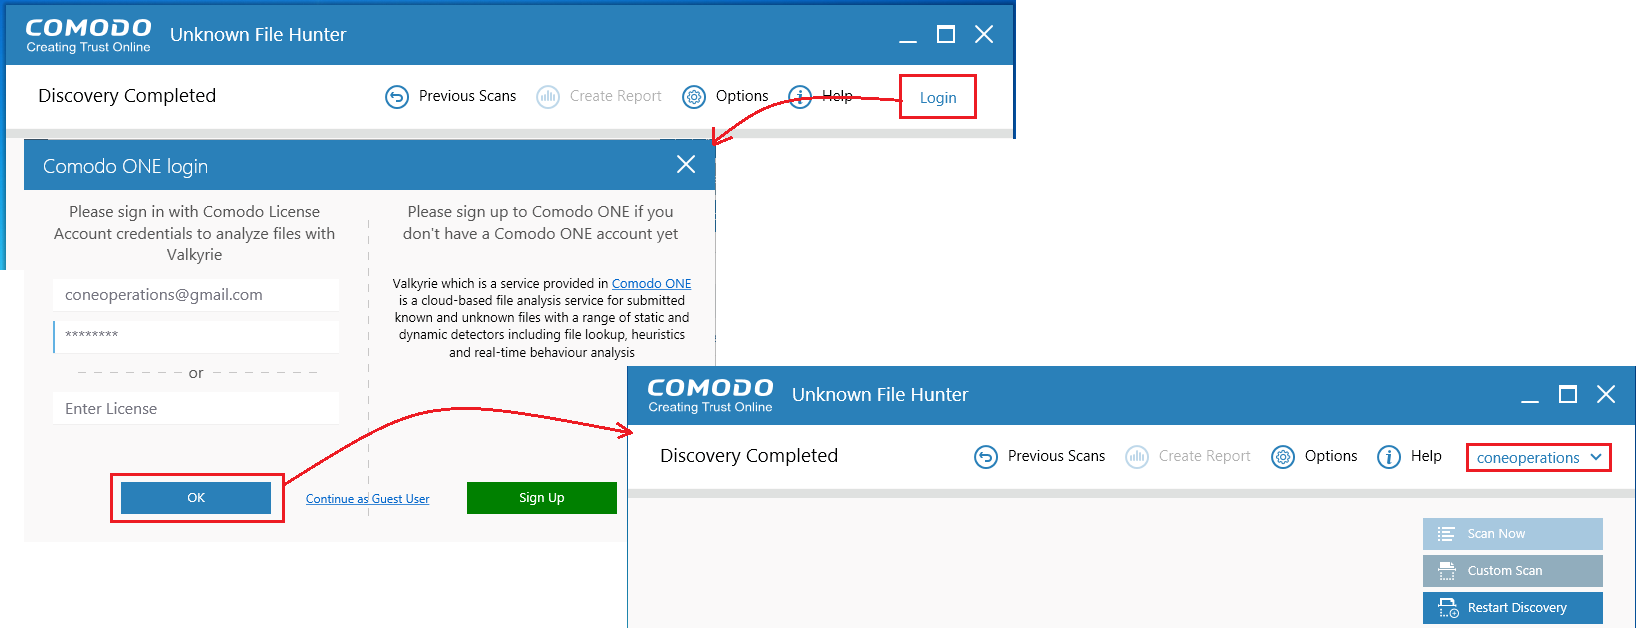
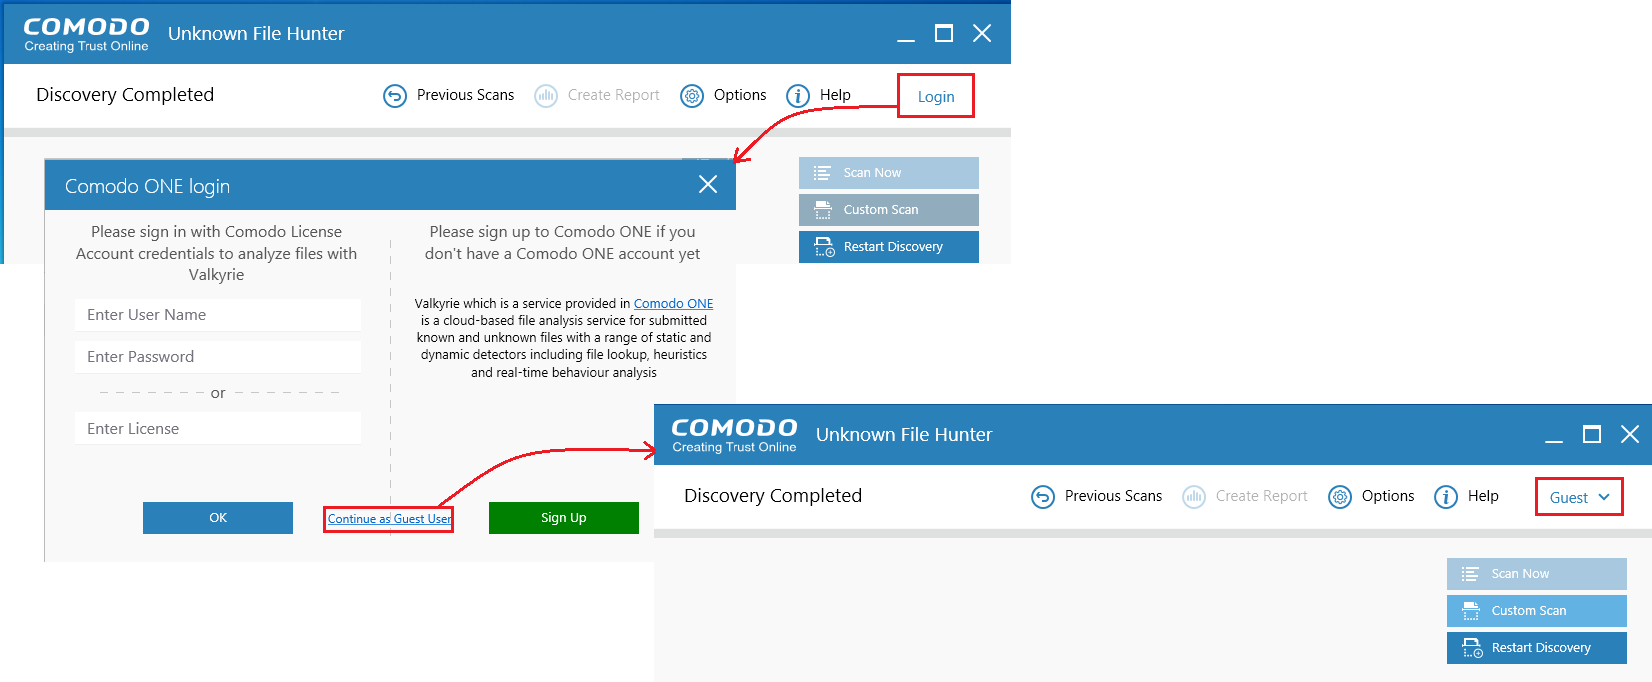
Login to the application enables all files to be scanned and be uploaded to Valkyrie if it's needed.
-
Use your C1 username and password for login
OR -
Provide your Comodo License
- Click 'Continue as Guest User' if you do not have an account. It provides the same capabilities as the other types of login.
Note:
If you do not have a Comodo one account, click 'Sign Up' to create a free C1 account.
Choose a scan type:
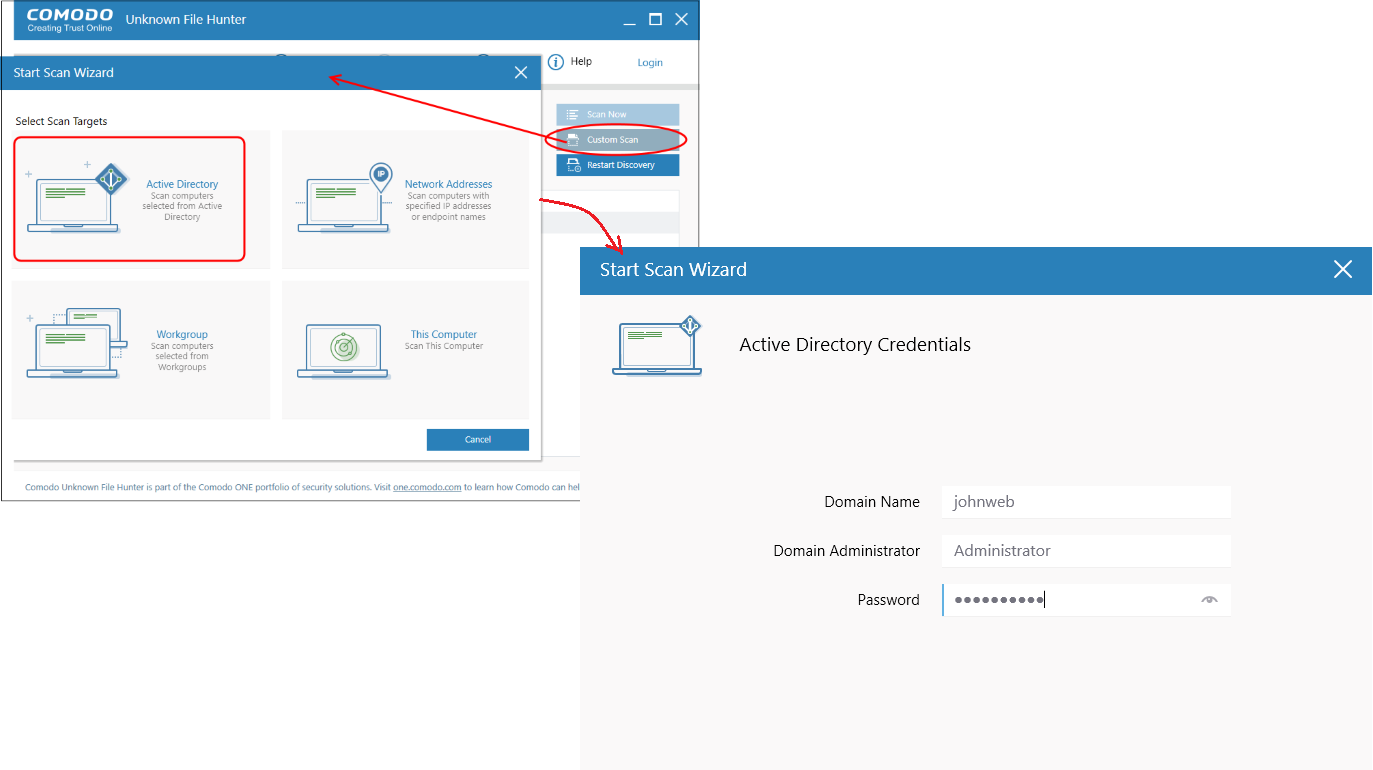
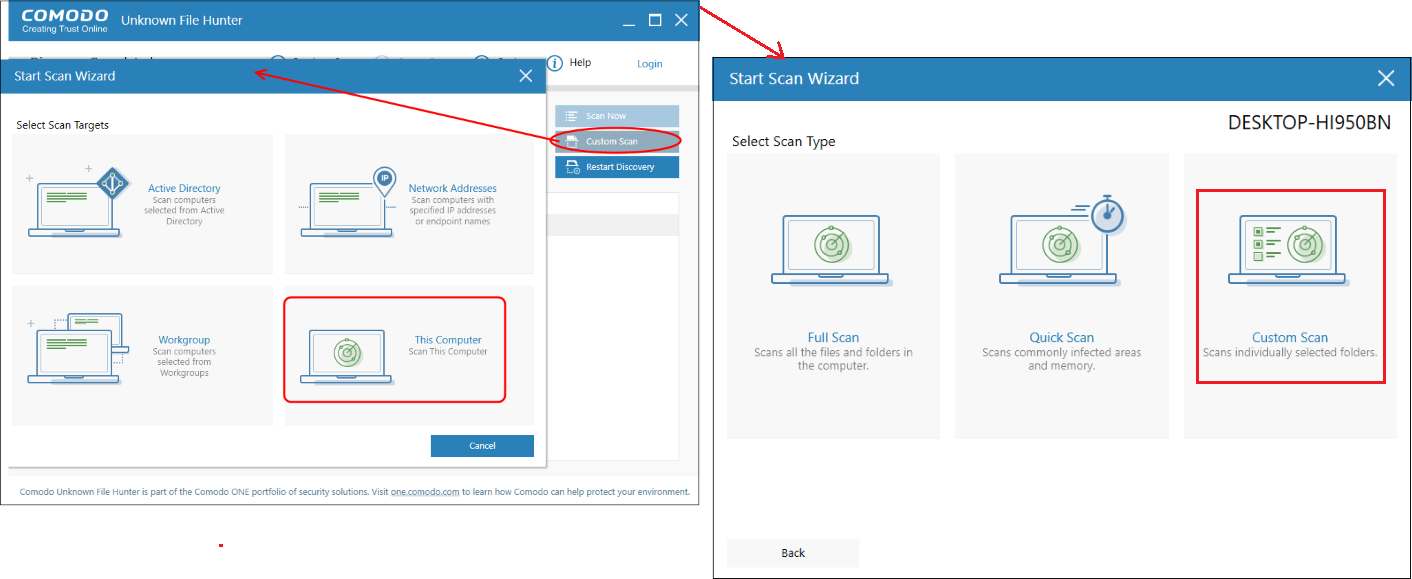
Click 'Custom Scan' in the UFH interface. You can run a full scan or a quick scan on the following:
-
Active Directory
-
Workgroup
-
Network Addresses
-
This Computer
Scan Credentials:
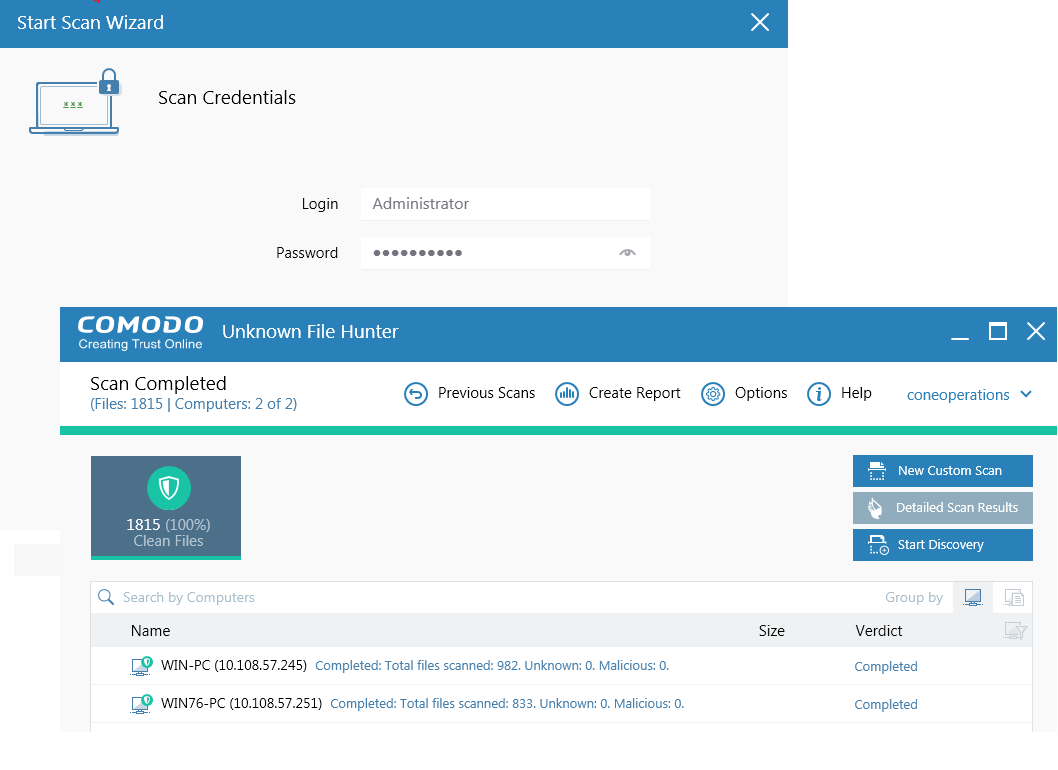
For any type of custom scan, You need to provide Scan credentials. This Scan Credentials should have the built-in administrator rights.
Unless you are using the built-in admin account, you need to disable a UAC option named as User Account Control: Run all administrators in Admin Approval Mode.
There are two distinct policies governing UAC behaviour (both found in Computer settings\Windows settings\Security settings\Local policies\Security options), one for the built-in Administrator account, and another one for all other administrative users:
- User Account Control: Admin Approval Mode for the built-in Administrator account(disabled by default)
- User Account Control: Run all administrators in Admin Approval Mode (enabled by default)
Scan Active Directory domain
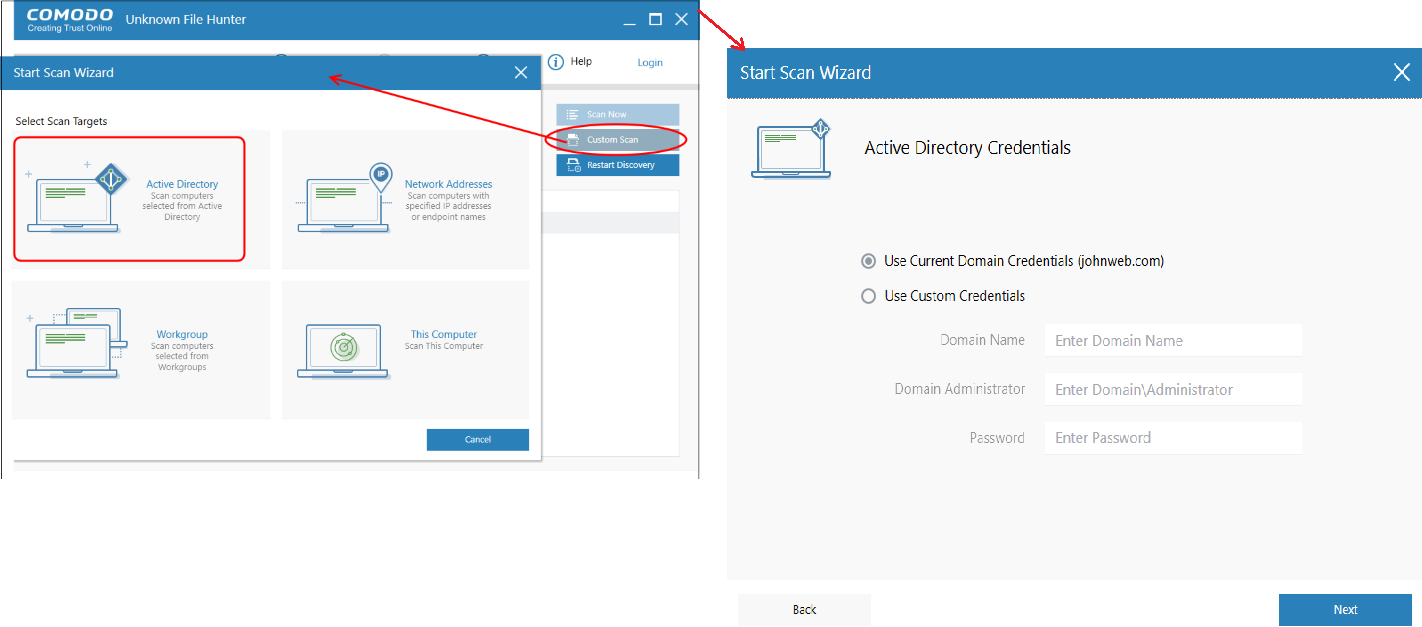
- Click Custom Scan --> Active Directory'.
-
Enter the domain name and the admin user name/password. Domain Name, Domain administrator and password if the endpoint is not connected to Active Directory
OR
-
Click 'Use Current credentials' if the endpoint is connected to the Active Directory
-
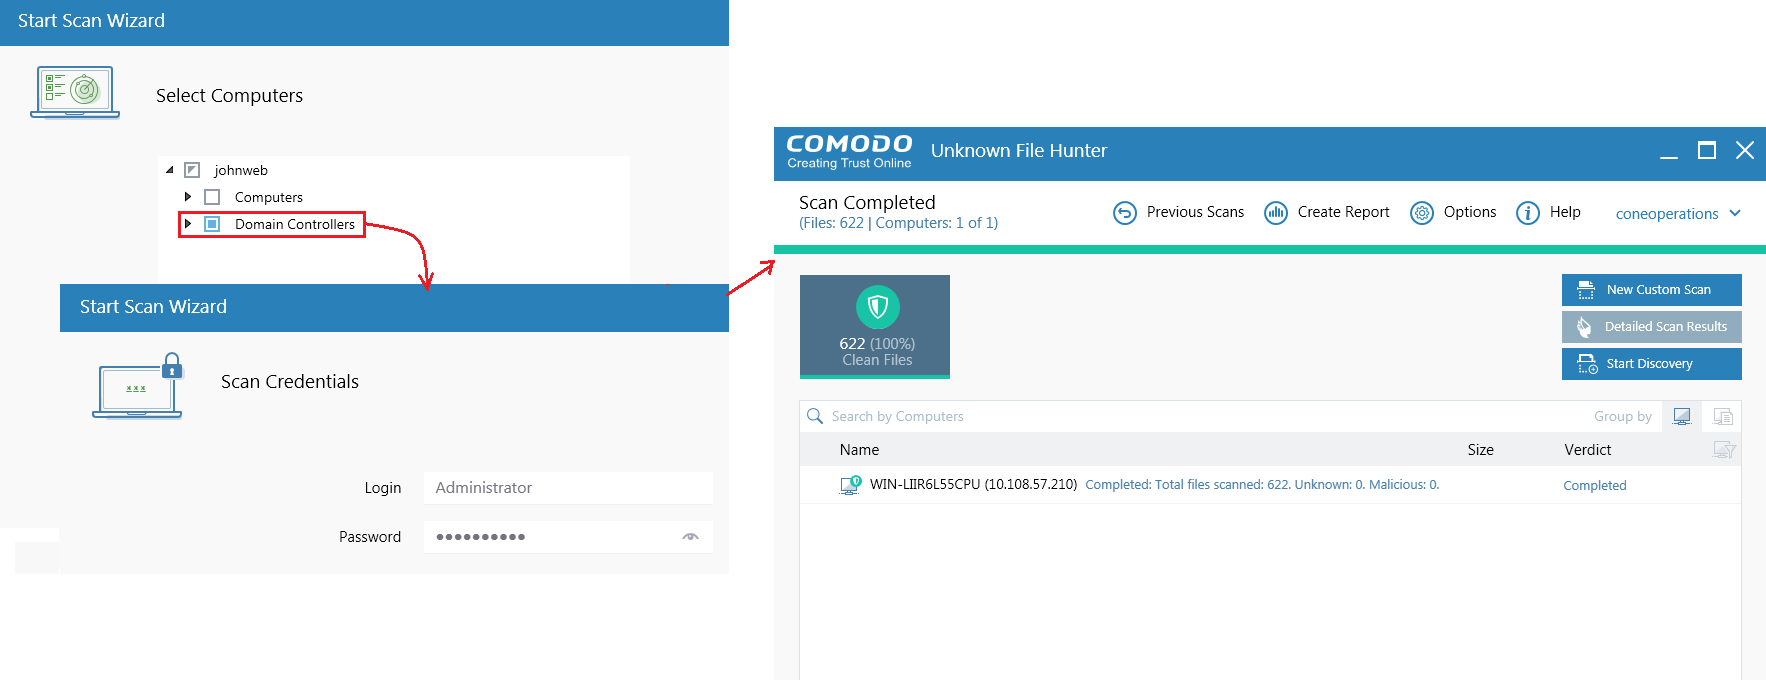
A list of available computers will appear after you successfully login.
-
Select the computers/domain controllers you want to scan
-
Click 'Scan Now'
Scan endpoints by Workgroup
-
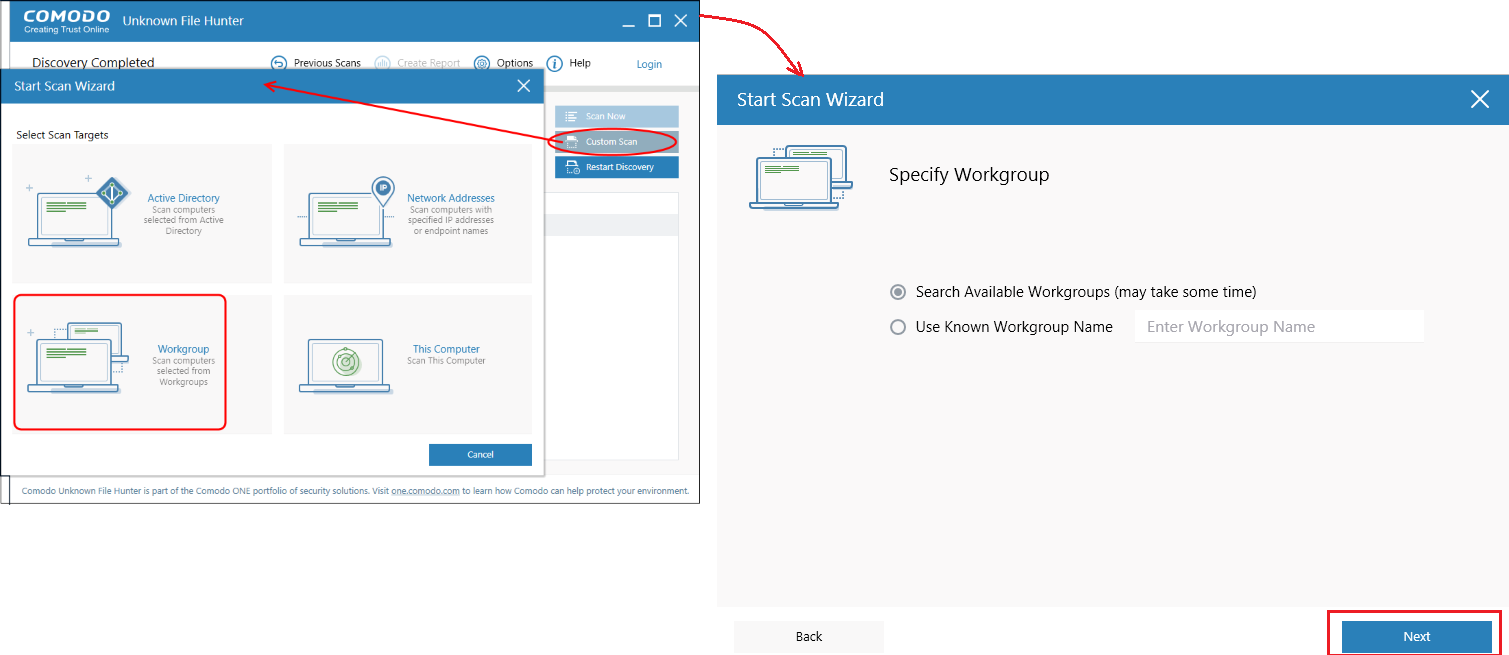
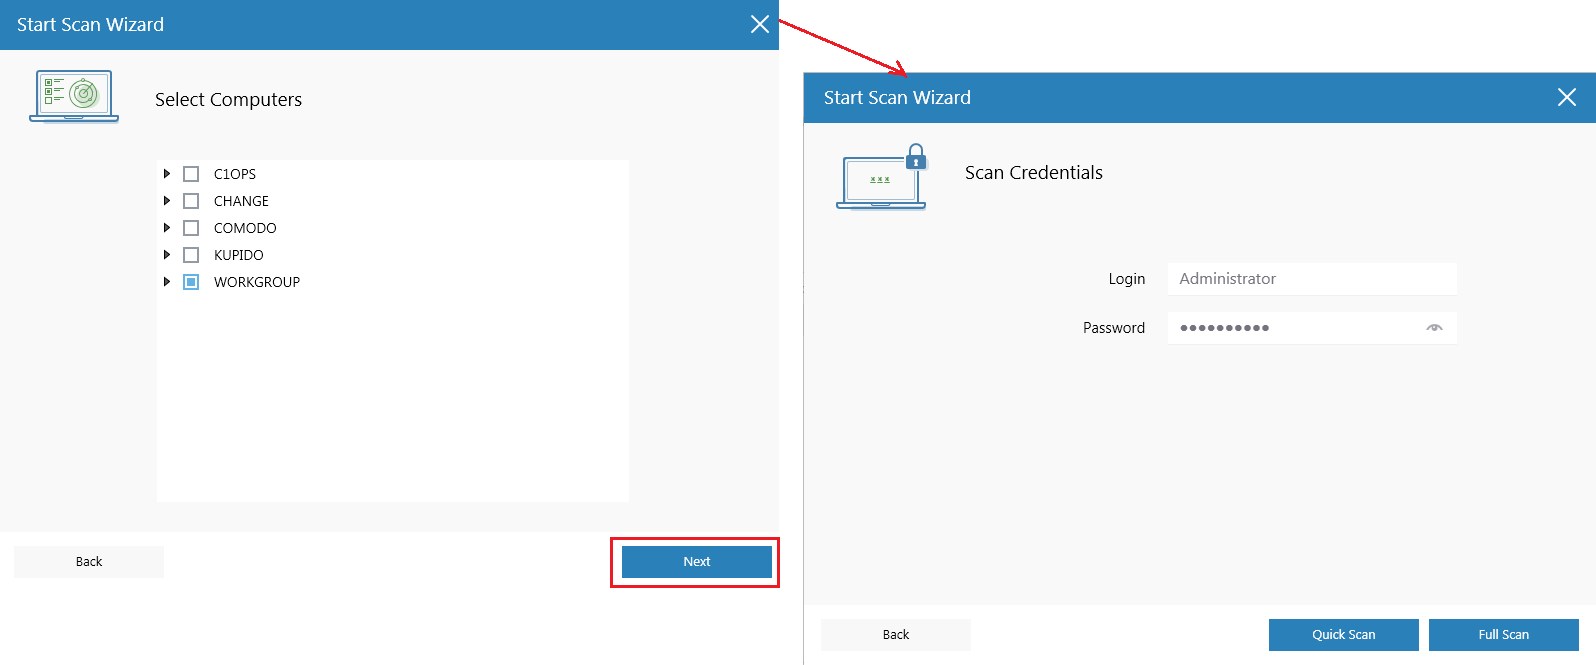
Click 'Custom Scan' > 'Workgroup'
-
Select the workgroup you want to scan, then choose specific endpoints if required.
-
Enter admin credentials for the workgroup so the scan can begin.
Pick a scan type:
-
Full scan - Scans all files and folders on target endpoints.
-
Quick scan – Scans critical and commonly infected areas of target endpoints.
Scan endpoints by Network Addresses
-
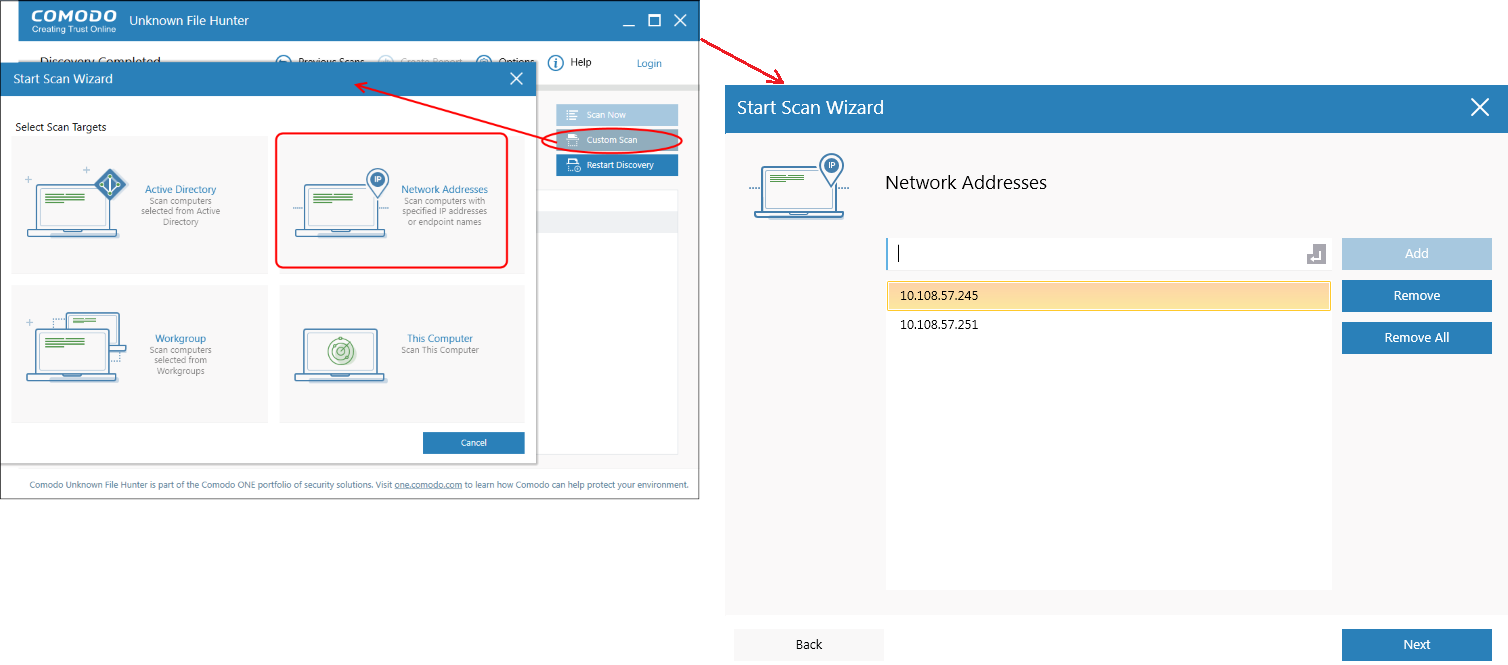
Click 'Custom Scan' > 'Network Addresses'
-
Enter the addresses you want to scan. You can add addresses in the following format:
-
IP address - 10.0.0.1
-
IP range - 10.0.0.1-10.0.0.5
-
IP subnet - 10.0.0.0/24 or 10.0.0.0/255.255.255.0
-
Host Name – e.g., 'Home Computer'
-
-
Click the 'Add' button to register the item for the scan
-
Repeat the process to add more addresses/host-names. Click 'Next' to continue.
-
Select a scan type and provide admin login credentials to start the scan.
Scan local computer
-
Click 'Custom Scan' > 'This Computer'
-
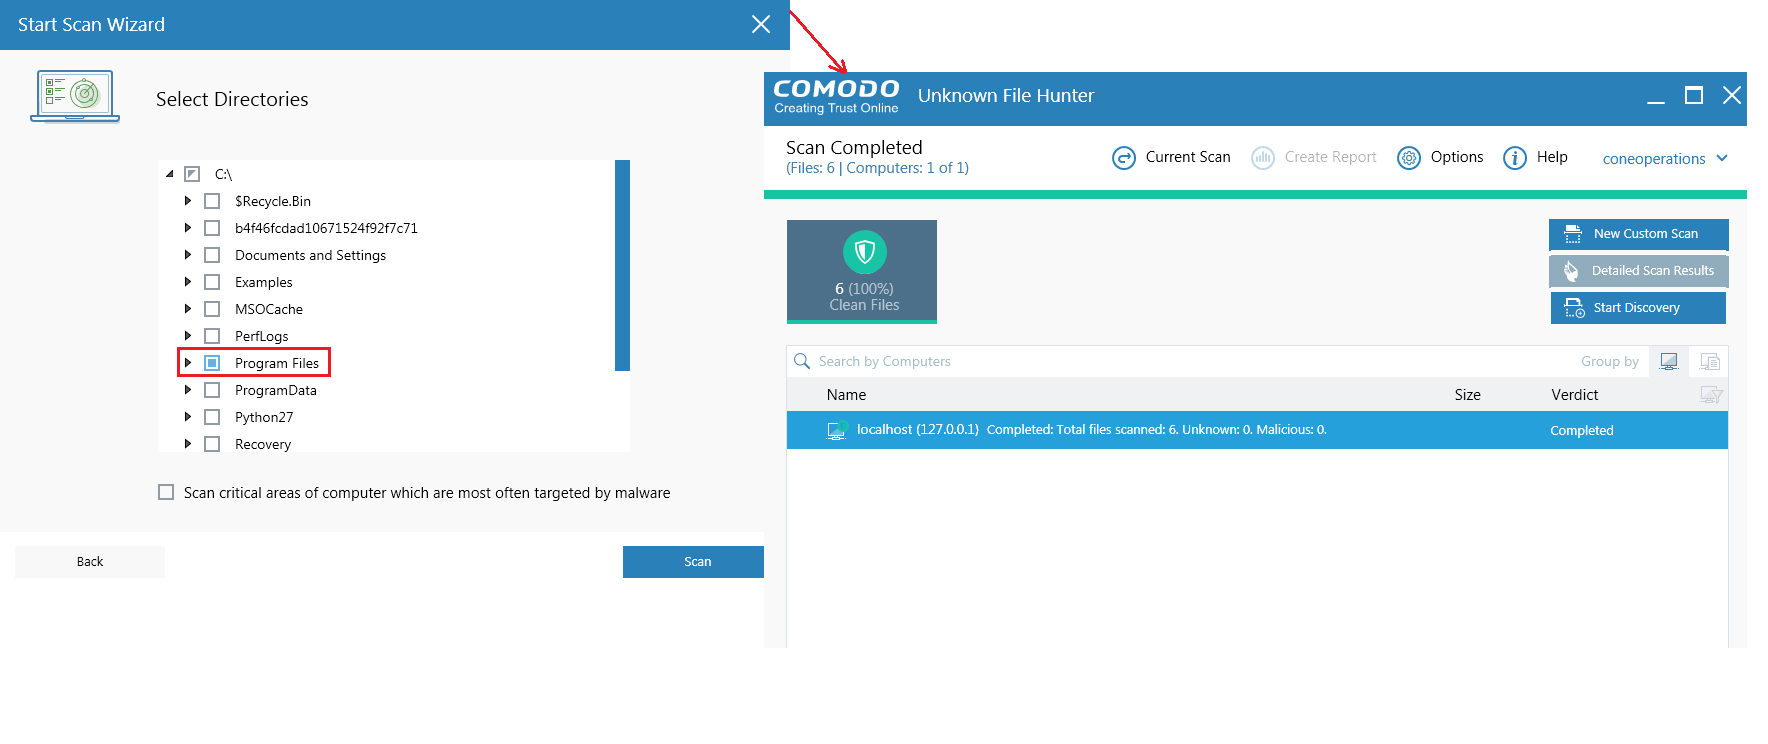
Select the type of scan : Full, quick or custom
-
Quick scans and full scans will begin immediately
-
For a 'Custom Scan', you need to choose the directories and files you want to scan
Results:
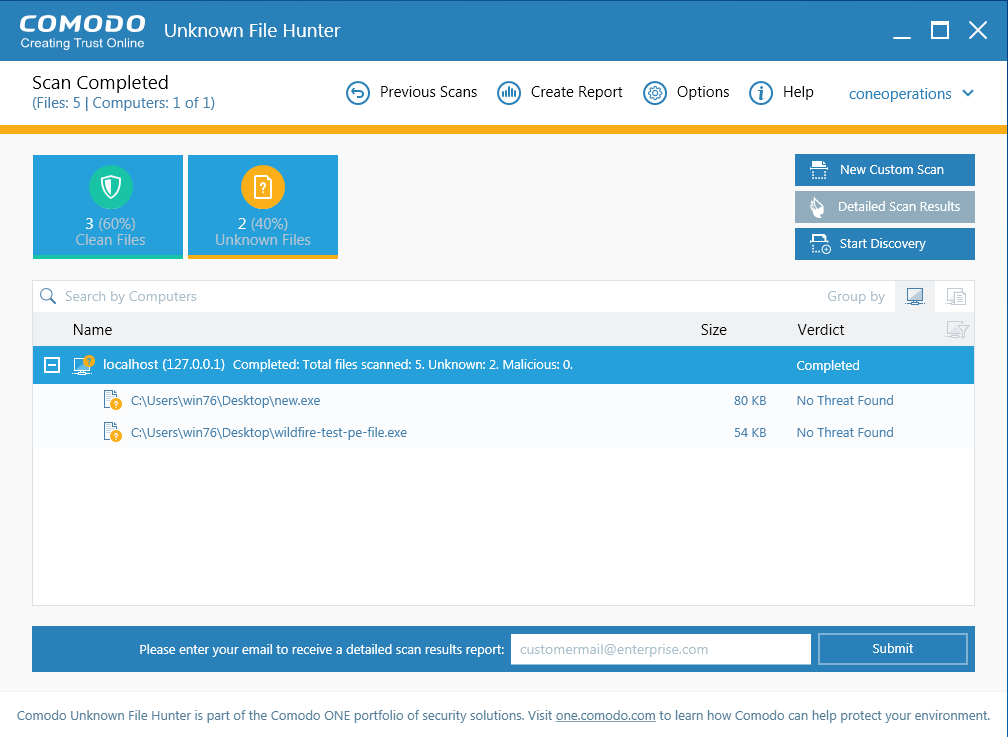
Results are shown in the UFH interface after the scan completes. File ratings are as follows:
- Clean - A whitelisted file which is safe to run
-
Unknown - There is no trust verdict available for this file.
-
Malicious - A blacklisted file which is a known threat / malware
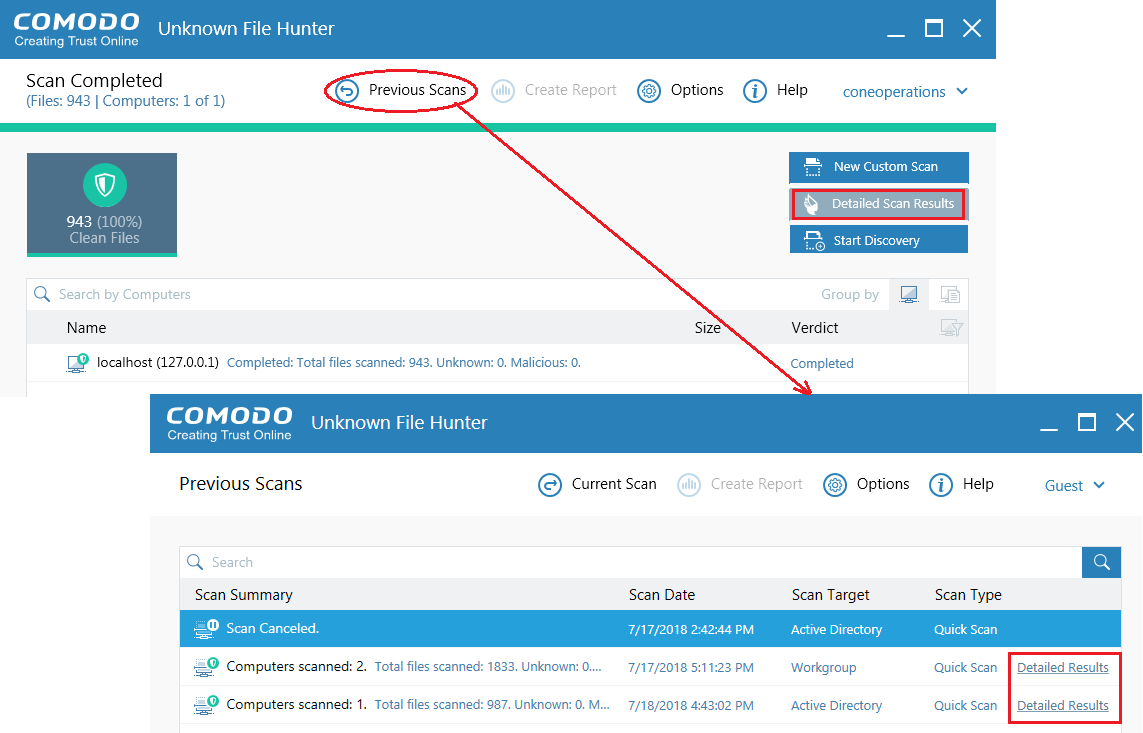
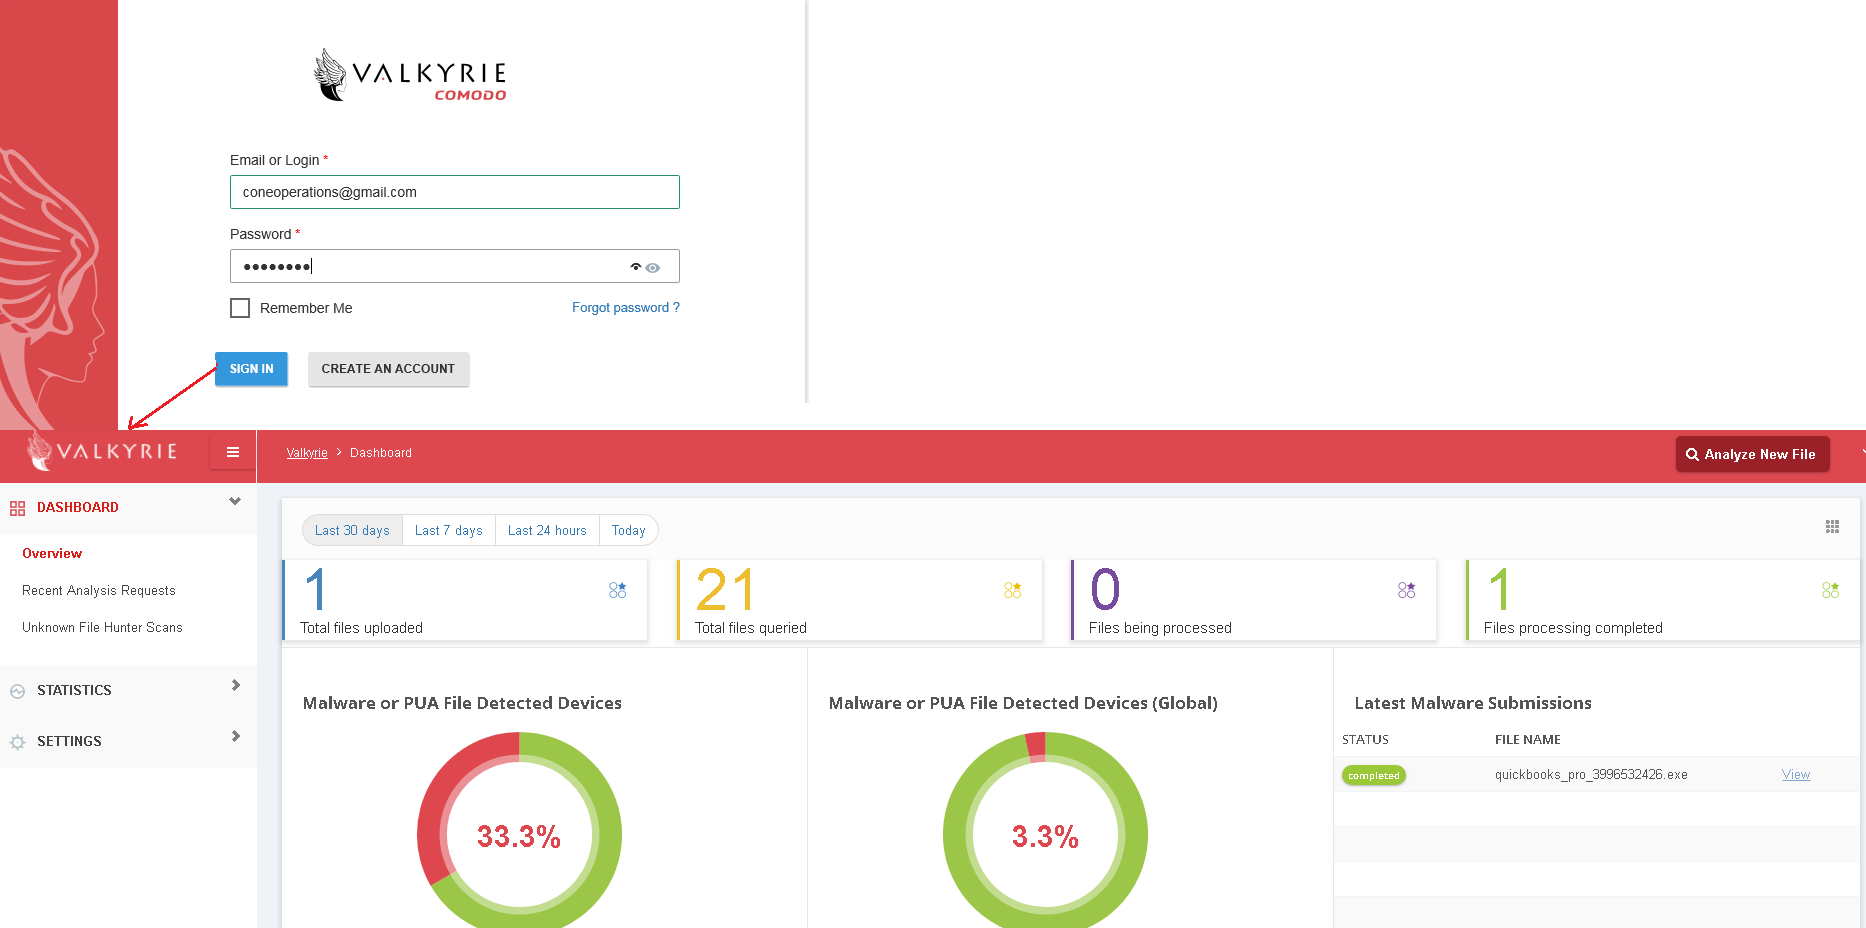
You can upload unknown files to Valkyrie for analysis. The tests run by Valkyrie will determine whether the files are good or bad. You can login to the Valkyrie web interface to view detailed test results on unknown files:
-
Click 'Detailed Scan Results'
-
You will be taken to the Valkyrie site
-
Login to Valkyrie using your Comodo One account, or create a new account
Configure UFH reports
-
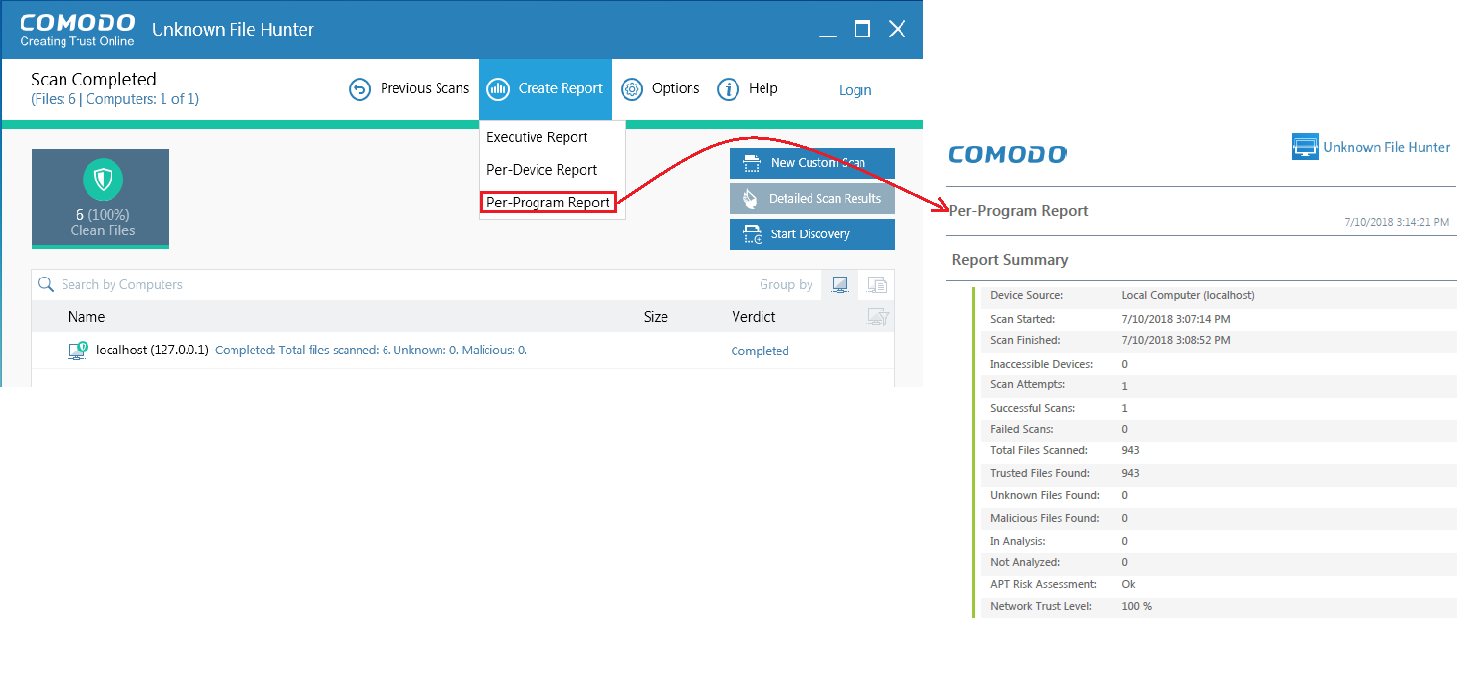
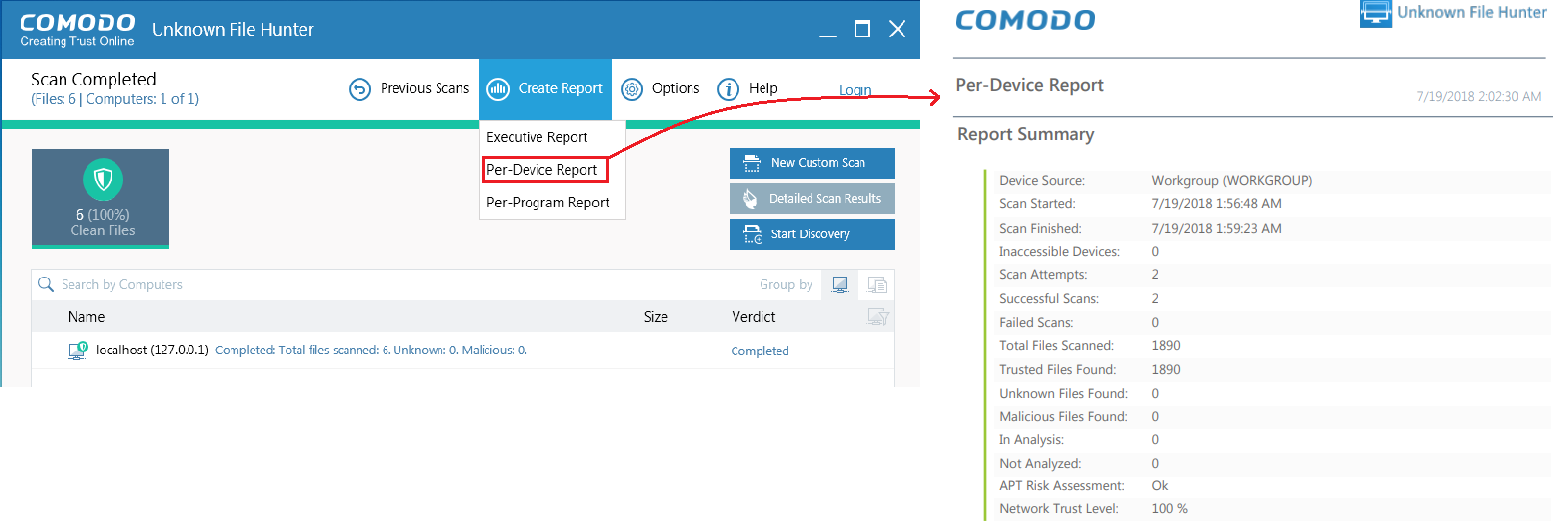
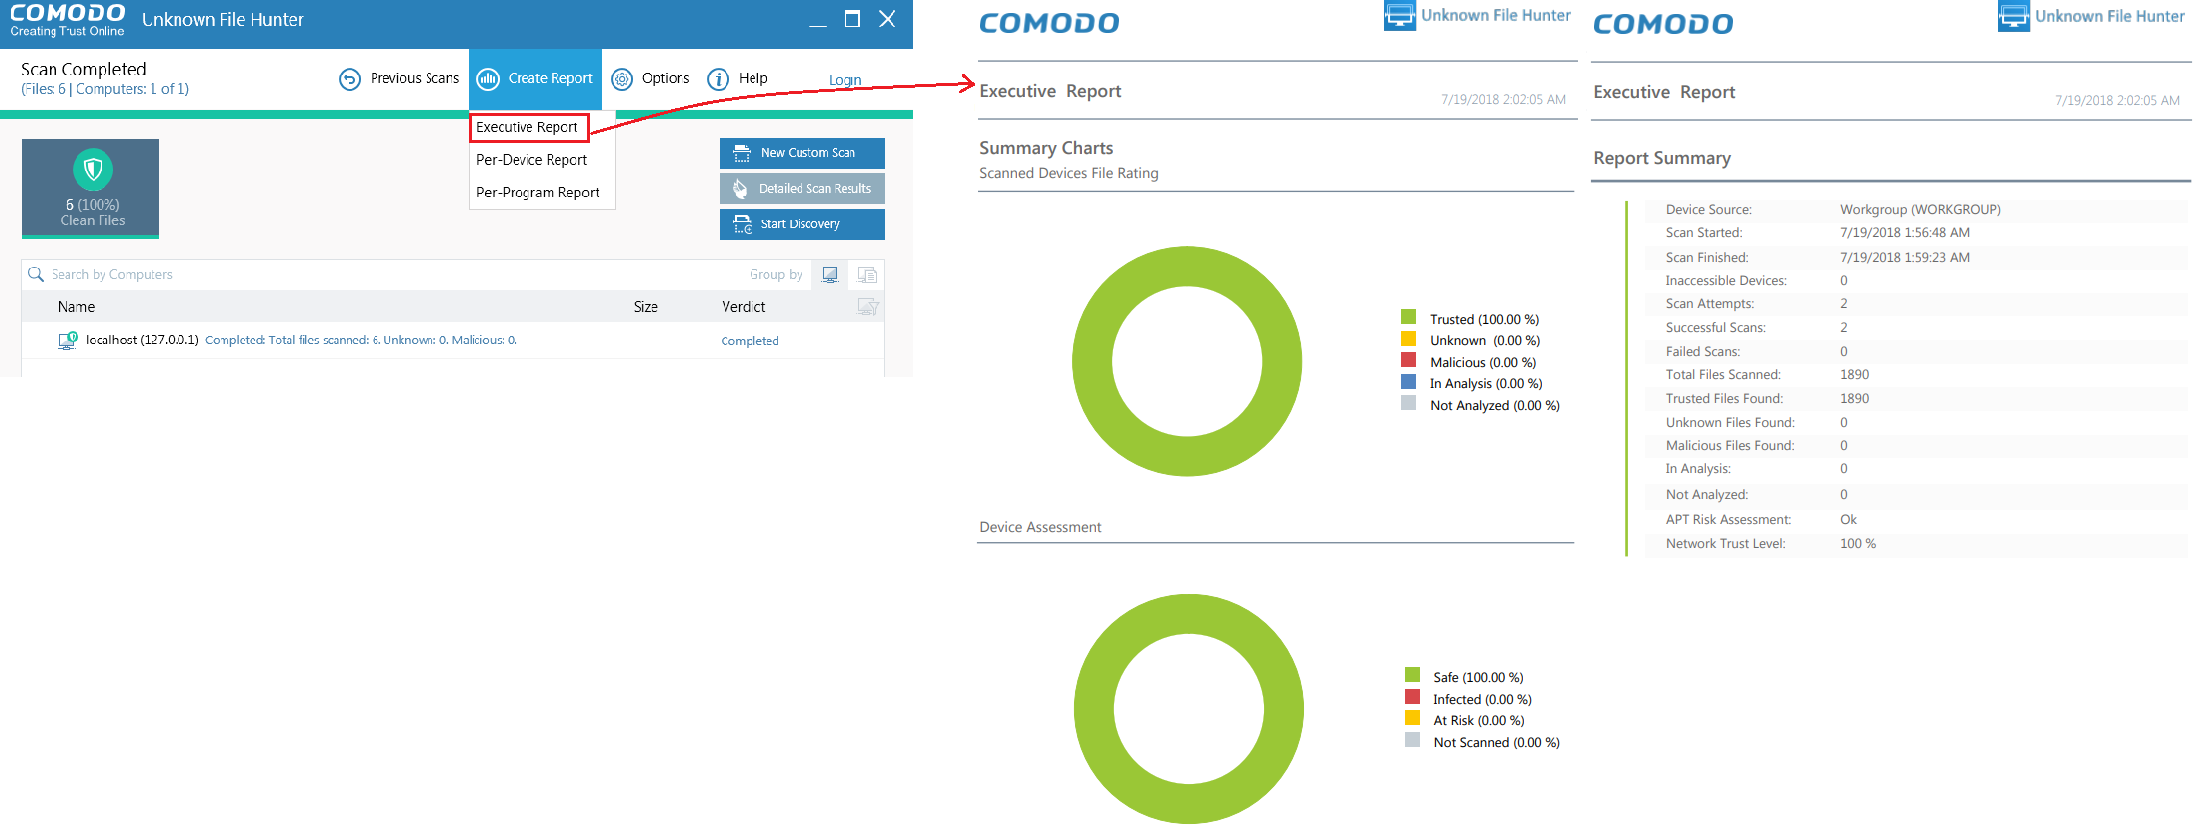
Click 'Create Report' in the UFH interface
-
Select one of the available report:
-
Per Program Report - A report with details on each unknown / malicious program. The report also specifies on which devices the file was found.
-
Per Device Report - Scan results grouped by device.
-
Executive Report - A detailed summary of the scan. Includes the number of devices scanned, the number of unknown programs found and more.
