How to manage staff roles in Service Desk
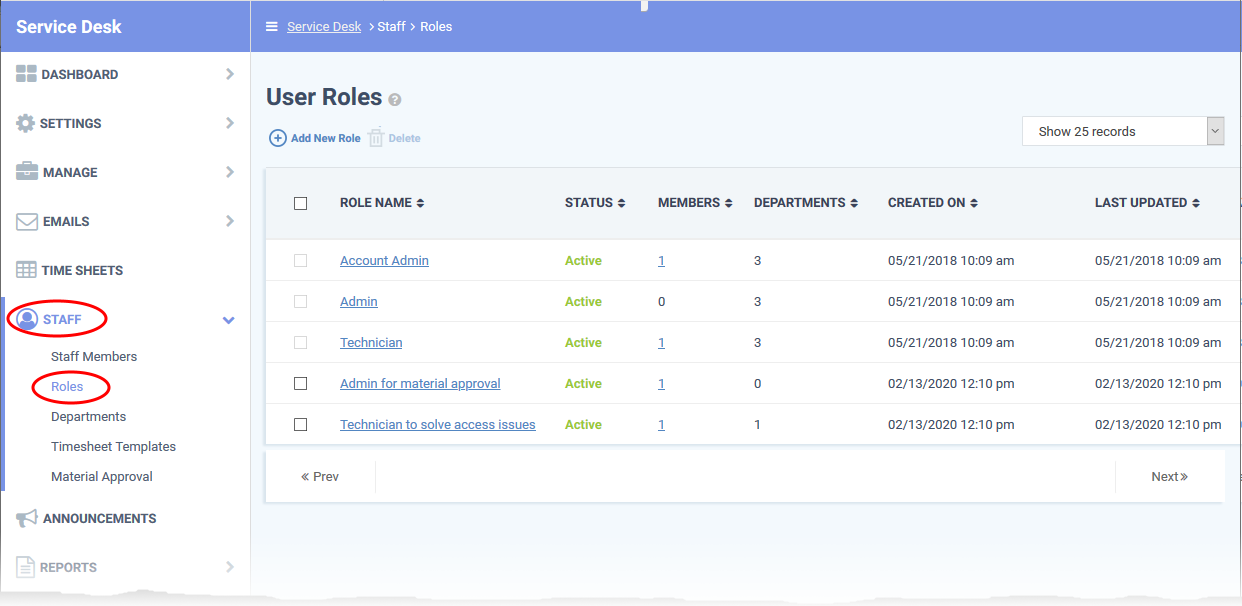
Click 'Admin Panel' > 'Staff' > 'Roles'
- Roles determine the permissions and access rights that staff members have within the Service Desk interface
- Service Desk inherits three roles from Comodo One / Dragon:
- Account Administrator
- Administrator
- Technician
- Account Administrator
- 'Account Administrator' and 'Administrator' cannot be deleted, but you can modify them. These roles initially have access to all areas and full control over all departments.
- You can also create custom-named roles with different permissions.
- New staff added to Comodo One / Dragon are added to Service Desk with the same role.
- Admins can move staff to another role in the 'Staff Members' interface (‘Admin Panel’ > ‘Staff’ > ‘Staff Members’ > click on a staff member’s name).
- See this wiki if you need help to do this.
- See this wiki if you need help to do this.
- This article explains how to create and manage custom roles in Service Desk
Use the following links to jump to the area you need help with:
- Login to Comodo One / Dragon
- Click 'Applications' > 'Service Desk'
- Open the admin panel (see the last link on the left)
- Click 'Staff' > 'Roles':
Role Name: The role label.
Status: Enable or disable the role.
- Staff members with a disabled role cannot log in to Service Desk.
- Click the role name to activate/deactivate the role.
Members: The number of staff members assigned to the role.
- Click the number to view the member list.
Departments: The number of departments that can be accessed by role members.
Created On: The date and time at which the role was created.
Last Updated: The date and time the role was last modified.
Create a new role
- Open the admin panel (see the last link on the left)
- Click 'Staff' > 'Roles'
- Click 'Add New Role' at the top:
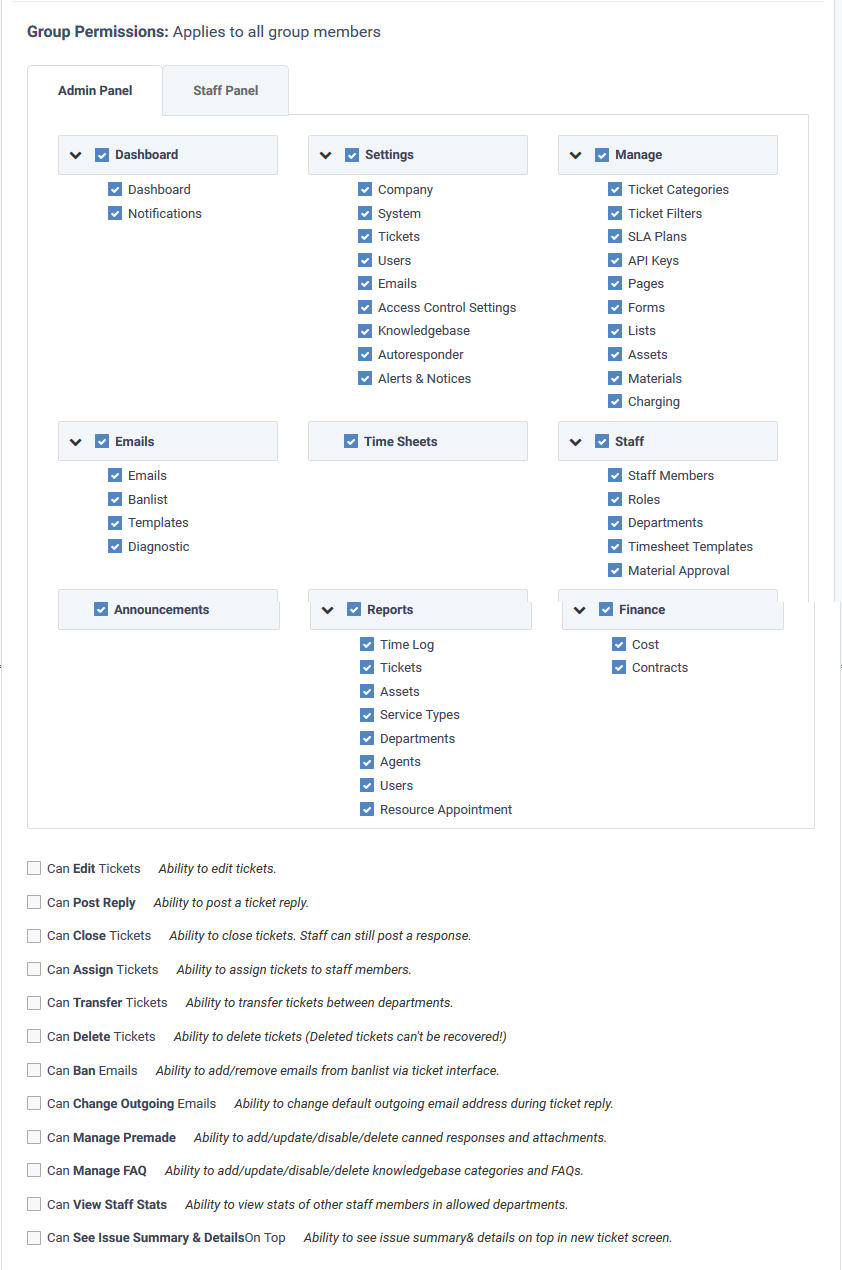
From top-to-bottom, role permissions are split into three main groups:
- Group permissions - which areas of the staff and admin panels are visible to role members.
- Functional permissions - what actions role members can or cannot do.
- Department access - which departments role members are allowed to access.
The ' Add New Role' screen contains the following fields and options:
Role Information
- Name: Enter a descriptive label for the role.
- Status: Select whether the role is active or disabled. If disabled, role members cannot log in to Service Desk and will not receive department alert & notices.
Group Permissions
- Group permissions let you set access rights to specific features and areas of Service Desk. You can set different permissions for both the admin and staff panels.
- Disabled features will not be visible to staff who have this role.
- The area directly underneath lets you choose the functions that role members can perform:
Department Access
- Select which departments can be accessed by role members. These departments are added to the primary department to which the staff member belongs.
Admin Notes
- Add remarks regarding the role for the reference of other admins.
Click the 'Create Role' button to save your new role.
Edit a role
- Open the admin panel (see the last link on the left)
- Click 'Staff' > 'Roles'
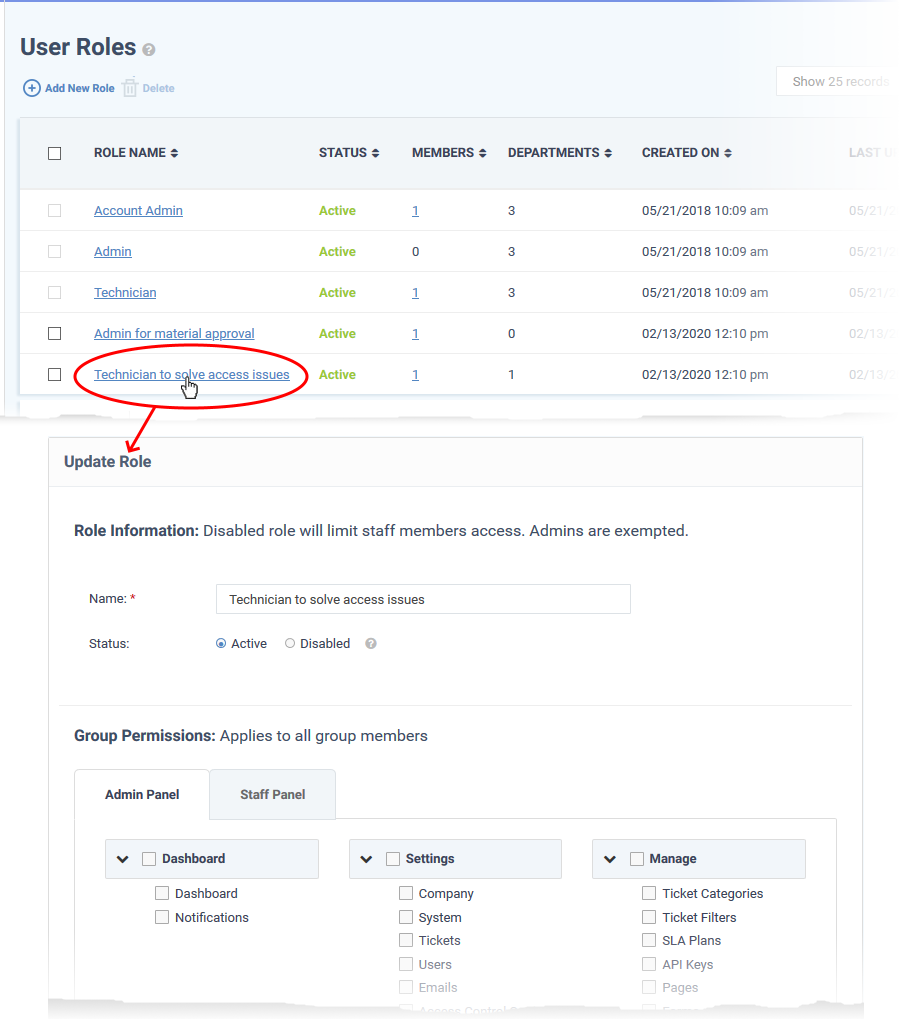
- Click on the role you want to edit.
The 'Update Role' interface lets you change the role name, enable/disable the rule and change role permissions. The interface is similar to the 'Add New Role' interface. See the explanation above for help to do this.
Remove roles
- You cannot delete roles inherited from Comodo One / Dragon, and you cannot delete roles that still have staff assigned to them.
- Remove all staff from a role before attempting to delete it.
Remove a role
- Open the admin panel (see the last link on the left)
- Click 'Staff' > 'Roles'
- Select the role you want to remove
- Click 'Delete':
- Click 'Yes, Do it!' to confirm the removal


