How to setup your support email address
Click 'Admin Panel' > 'Emails' > 'Emails'
- Service Desk can automatically create tickets from emails sent to your support email address.
- You must first enable email fetching at 'Admin Panel' > 'Settings' > 'Emails'
- You can then specify your support addresses at 'Admin Panel' > 'Emails' > 'Emails'
- There are two ways you can setup email fetching:
- Fetch emails via forwarding - Service Desk generates a unique forwarding address for your account. You add a rule to your mail server to forward support emails to this address. Mails sent to the forwarding address are converted into tickets.
- Fetch emails via IMAP or POP - Service Desk collects support emails direct from your mail server then converts them into tickets.
- Fetch emails via forwarding - Service Desk generates a unique forwarding address for your account. You add a rule to your mail server to forward support emails to this address. Mails sent to the forwarding address are converted into tickets.
Use the following links for more help:
- Login to Comodo One / Dragon
- Click 'Applications' > 'Service Desk'
- Open the admin panel (see the last link on the left)
- Click 'Settings' > 'Emails'
- Enable email fetching as shown below:
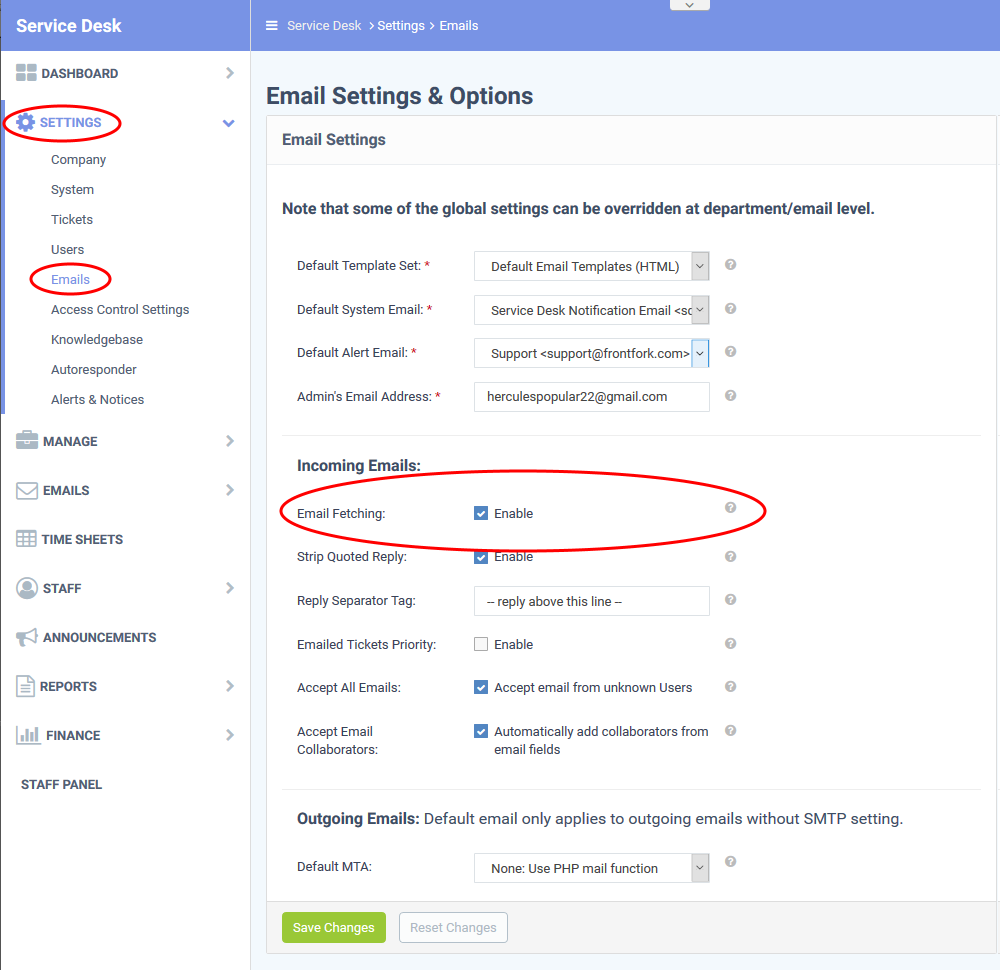
- Click 'Save Changes' for your settings to take effect
Add a new support email address
- Open the admin panel (see the last link on the left)
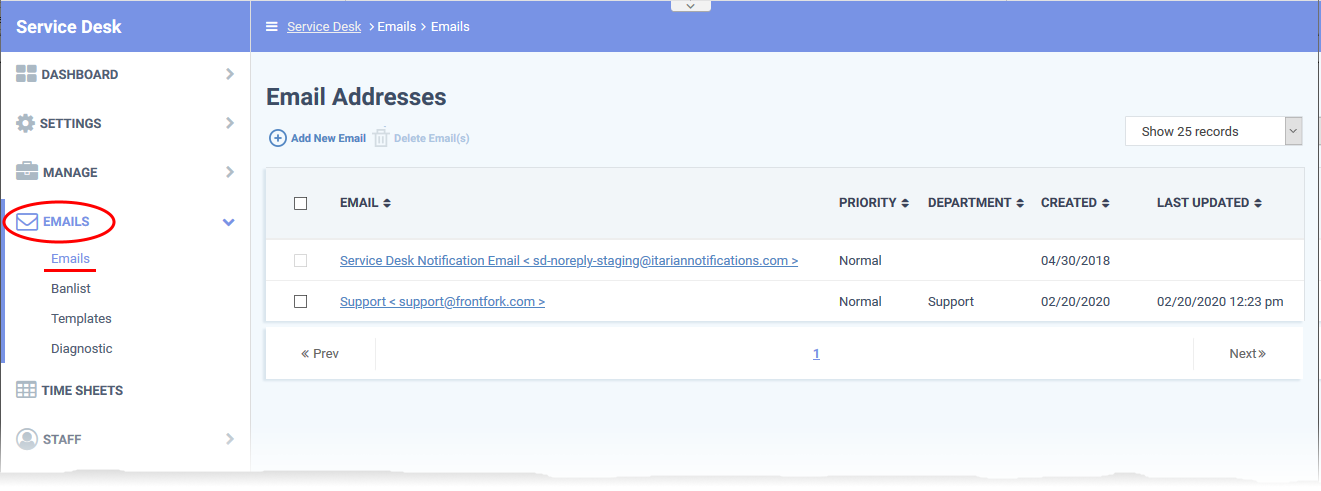
- Click 'Emails' > 'Emails'
- The interface lists all existing support email addresses and allows you to create new addresses:
- Click 'Add New Email':

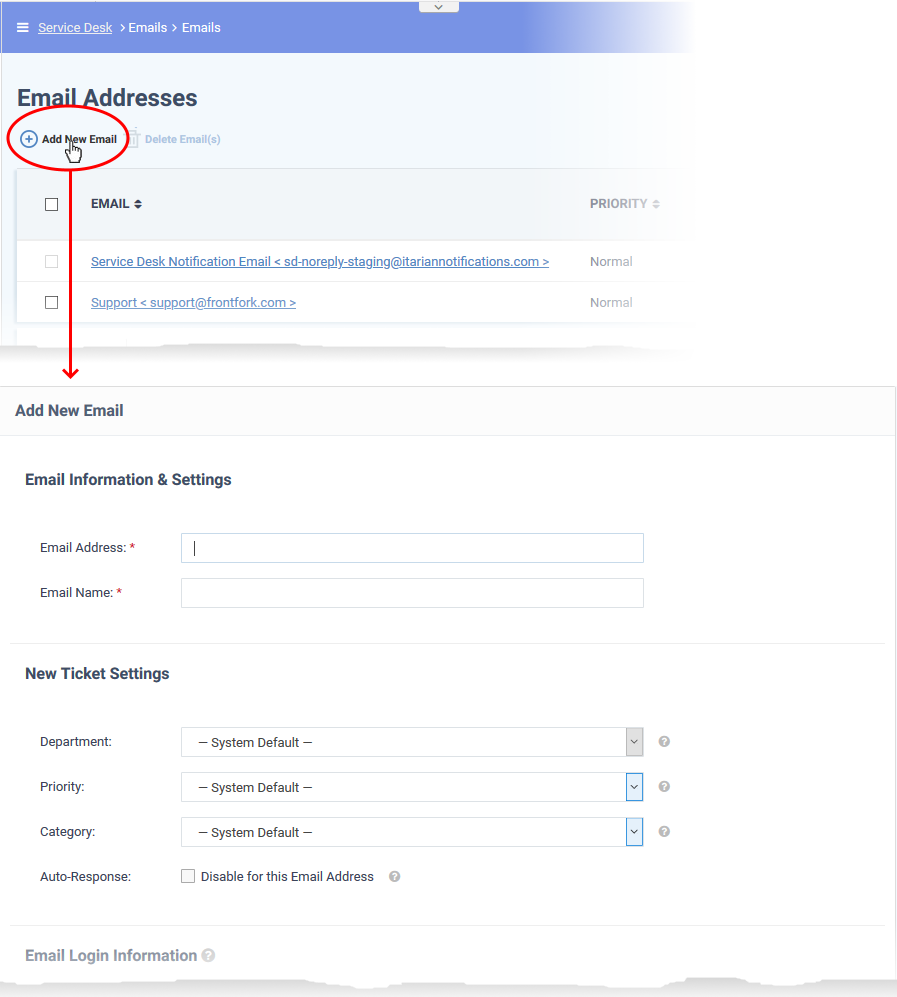
- Email Address: Enter the email address to which users should send support requests. Service Desk will automatically convert mails sent to this address into tickets.
- You can only have one instance of each email address on this page.
- You should setup multiple addresses if you want to assign specific mails to specific departments or categories. For example, general-inquiries@my-company.com, account-questions@my-company.com, server-issues@my-company.com, enterprise-support@my-company.com, etc.
- You can only have one instance of each email address on this page.
- Email Name: Enter a unique name to identify the address. For example, ‘Front Desk Support Requests’.
- Department: Assign tickets sent to this email address to a specific department. If you don’t choose a department then the ticket is assigned to the default department. You can set the default department at ‘Admin Panel’ > ‘Settings’ > ‘System’.
- Priority: Choose the criticality of tickets which were created from mails sent to this address. For example, Low, Normal, High.
- Category: Choose the ticket category assigned to tickets created via this email address.
- Ticket categories are broad support topics such as ‘Billing’, ‘Account changes’, ‘Technical Support’ and so forth. You can setup ticket categories at 'Admin Panel' > 'Manage' > 'Ticket Categories'.
- These categories are usually presented to users to help them more easily select the area with which they need help. For example, your customer-facing help page might have a menu which says 'Please select the area we can assist you with'.
- You might want to assign the ticket to a category IF you intend for it to be handled by a specific department. If so, then please make sure you have created separate (corresponding) email addresses for each category in ‘Admin Panel’ > ‘Emails’ > ‘Emails’.
- See this wiki to read more on ticket categories.
- Ticket categories are broad support topics such as ‘Billing’, ‘Account changes’, ‘Technical Support’ and so forth. You can setup ticket categories at 'Admin Panel' > 'Manage' > 'Ticket Categories'.
- Auto-Response: Auto-responder mails are sent to users to confirm that you have received their support request. Select this option if you don’t want to send these automatic responses.

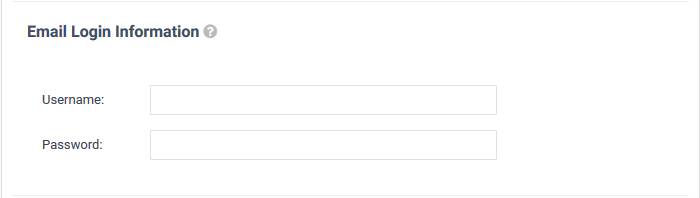
- Username: The username of the email account. This is usually the same as the email address.
- Password: The password of the email account
Service Desk uses the account credentials to fetch incoming mail via IMAP/POP and to send responses via SMTP.
- Use this option if you want Service Desk to create tickets from mails forwarded to a specific address.
- Service Desk automatically generates an address for you to use:
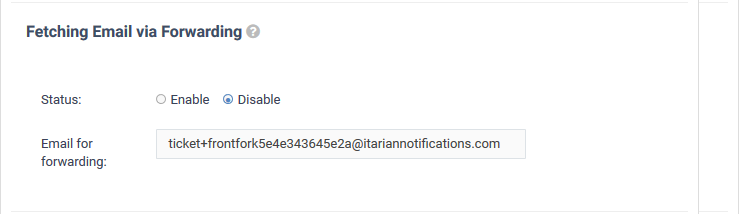

- Configure your mail server to forward mails to the address in the ‘Email Address’ field to the forwarding address.
- Mails sent to the forwarding address are converted into tickets.
|
To confirm that you can receive mail at the forwarding address, some mailboxes send a verification code to the new address. This verification code should be pasted in the mailbox configuration page. You can view the verification code sent by your mailbox as a ticket in the 'Tickets' interface:
|
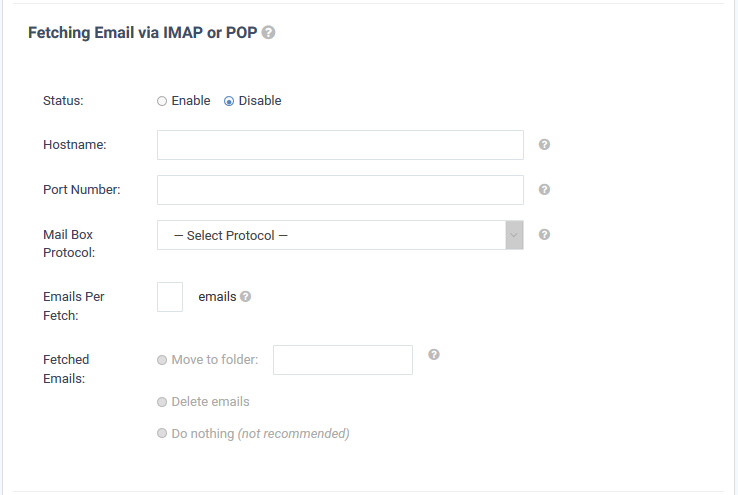
- Use this option if you want Service Desk to collect support emails direct from your mail server. Service Desk will convert mails received from the support email address into tickets.
- You need to specify the hostname, port and protocol of your mail server.

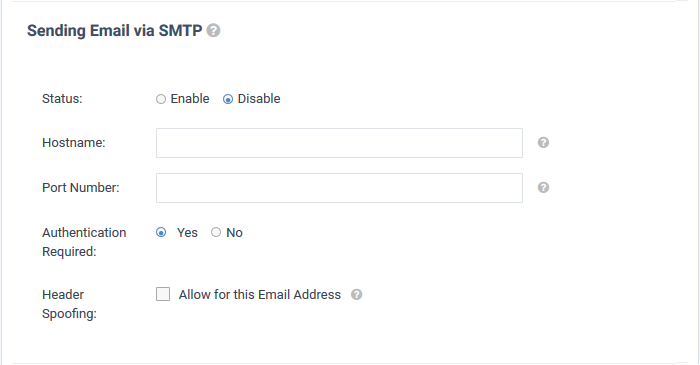
- Use this option if you want Service Desk to send outgoing mail, like auto-responses, from the address specified in the email address field.
- You need to specify the hostname and port number of your SMTP server:

Internal Notes
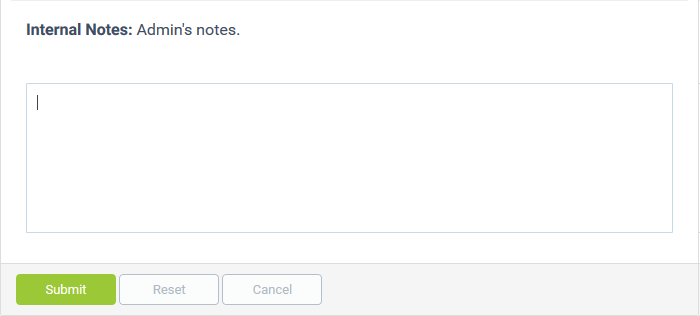
- Add any notes related to the email address for internal purpose.
- Click the 'Submit' button
Note – You cannot remove an address if it is set as the default for receiving alerts. Click 'Admin Panel' > 'Settings' > 'Emails' to change the 'Default Alert Email' address.
- Open the admin panel (See the last link on the left)
- Click 'Emails' > 'Emails'
- Select the addresses you want to remove then click 'Delete Email(s)'

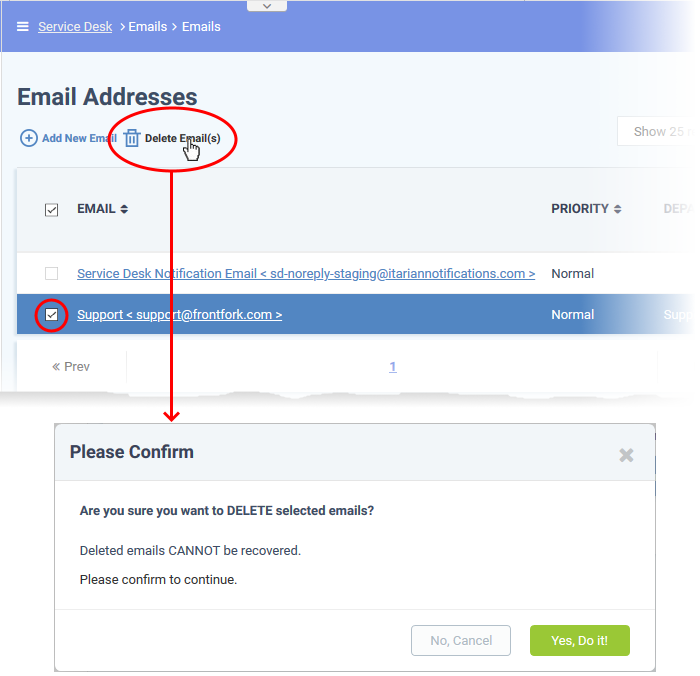
- Click 'Yes. Do it!' to confirm the removal.


---